Table of Contents
Modules - reg: How to register to CzechIdM?
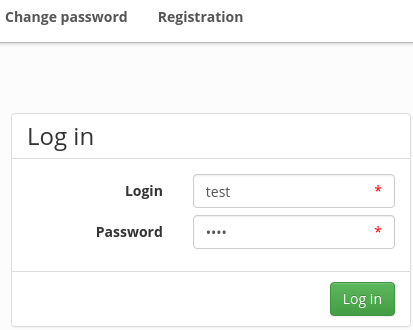
There is a registration link on the login dialogue page, which you can use to access the registration page.

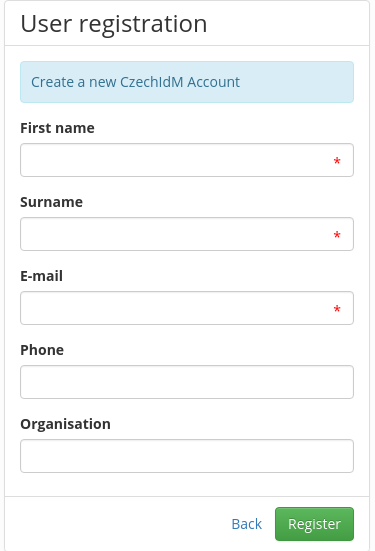
New user fills following fields:
- First name (mandatory)
- Surname (mandatory)
- Login (mandatory) – this choice is only available, if the own login option is turned ON in application setting. If the choice is not available, CzechIdM automatically generates the login.
- Email (mandatory) – if the user validation via email is turned ON in application settings, then the validation link (token) is sent to this email address.
- Telephone – user attribute. Depending on application settings, the telephone can be used for SMS notification, or administrator can contact the user via phone.
- Organization – description attribute. It usually serves for the administrators for consequent users cataloging.
- New Password (mandatory) – new CzechIdM password. There is also a password strength utility visible. If the new password box is not available, then it is turned off in application setting. In that case, password is generated by other means depending on other settings. Usually when the user gets account on some managed system which CzechIdM uses as an authentication point.
- New Password again (mandatory)
 When the form is filled, we pass the captcha (if ON) and continue with following steps: :
- the new user gets the email with URL link to CzechIdM.
- After he clicks on the link, the email address is validated.
- Then the registration process makes an user task on responsible person. This step can be skipped if configured in application settings.
- When the task is resolved, the newly registered user gets the email with the login, which he can use to access CzechIdM. If the CzechIdM is configured to authenticate against other system, the user has to have account on the system too, of course. If so, think about using automatic roles.
Registration process background
After the registration form is filled, following steps are done in the application.
- In CzechIdM, there is a new identity created and set as inactive. It has no roles and contracted positions. Login is generated if not set by the user.
- A new contracted position is created for the identity. The contracted position is placed in the organization tree. To be able to place the contracted position into organization tree, one has to set application setting option: idm.sec.reg.defaultOrgId. More about reg setting options in following sections.
- User gets automatic roles, when he is placed in the organization tree.
- The contracted position gets manager user by the application settings option idm.sec.reg.defaultAuthorizer.
- Email is sent to address that the user previously filled in the registration form. In the email, there is a link. When the user uses the link, he is forwarded to CzechIdM login page and the registration is confirmed. The registration link in the email has time limited validity.
- User task is generated for the users with role registrationalApproval. Caution, if this step is allowed in configuration and no one has the role assigned, then the registration process always fails. Turn on this step only if the at least one user has the role assigned or assign the role to the admin user as a fallback.
- When the task is resolved, identity is enabled (unblocked) and it gets the role defined in registration module configuration. Do not confuse those roles with automatic roles.
- All users with registrationNotification role assigned are notified about a new user creation.
Reg module configuration
- idm.sec.reg.loginGenerator – step 1. If the key is not defined, the user can type its own login. In other words the registration form has input box for the user to specify the login. Otherwise if the key is defined then the value of the option is the name of the CzechIdM login generation component. One possible value is e.g. „basicLoginGenerator“ (login has the following form: firstname + 1. character of lastname).
- idm.sec.reg.createEnabled – true, if the identity in step 1 and 2 should be created as enabled (unblocked)
- idm.sec.reg.defaultOrgId – step 2. The value of the option is entity_id of the organisation, in which we want to place registered users (via their contracted positions). We can find entity_id of the organisation on organization detail in CzechIdM GUI: Organizations → Structure elements → find org. e.g. by its name → organization detail (magnifying glass). Then we see the entity_id in URL of our web browser after TreeNode string. E.g. 767b8e11-122c-433a-9cde-2d686061aa3d.
- idm.sec.reg.confirmationTtlSec – number of seconds, that the registration URL in email is valid in step 3.
- idm.sec.reg.defaultRoles - step 5 – the value is a set of role names, that the users gets in registration process.
- idm.sec.reg.passwordPolicy – the value is the name of the password policy.
- idm.sec.reg.defaultAuthorizer – the value is the login of the identity, that is used as a manager of registered users (their contracted position).
- idm.pub.reg.terms.enabled - if value is true is mandatory agree with terms, terms url is now defined in this attribute: idm.pub.reg.terms.url.
- idm.pub.reg.terms.url - url with terms.
- idm.pub.reg.note.enabled - enabled note for request.
- idm.pub.reg.note.required - required note, beware if you set note as disabled and at the same time you set required note. Note will not be required.
- idm.sec.reg.find.caseinsensitive - write the list of codes of attributes (comma separated) for which the find is supposed to be case insenstitive. This is useful when activating account: if the identity in IdM has email "Jan.Novak@email.com" but the user tries to activate the account with email "jan.novak@email.com", it is not possible to activate the account without setting this property to 'true'. False by default. Since 2.3.2.
Steps 1-6 or their parts can be disabled by the following processors: request-confirm-processor, request-approve-processor, identity-finalize-processor, user-notification-processor, notification-processor, request-delete-processor.