Table of Contents
Run multiple CzechIdM instances using IntelliJ Idea and Gulp as a developer
If you somehow find yourself in a situation, when you need to run multiple CzechIdM instances for development (for example when testing CzechIdM's cloud capabilities), you may consider doing this using you IDE as it provides you some neat advantages over running separate virtual machines:
- It is way easier with "almost" same result
- You can debug both instances directly from IDE
Prerequisities:
- IntelliJ Idea (any recent version is OK) - you can do this on almost any IDE, but this tutorial only focuses on Idea
- Enough RAM and CPU power - running multiple instances on one machine may be a resource hog, although I did not come across any problems why running this setup
Backend - Idea
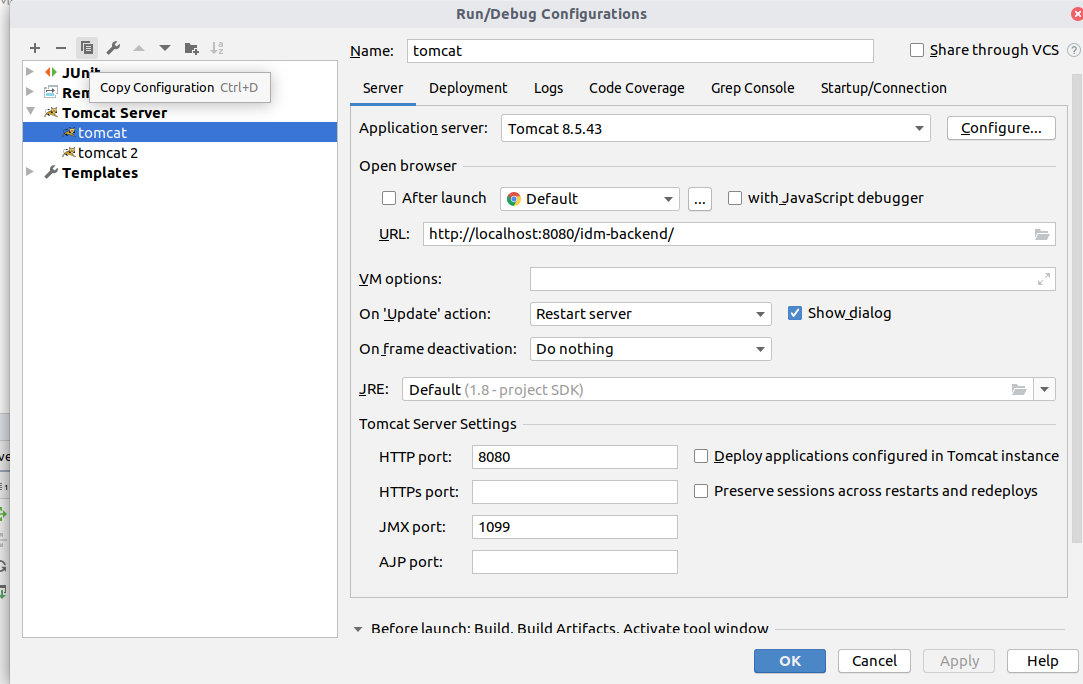
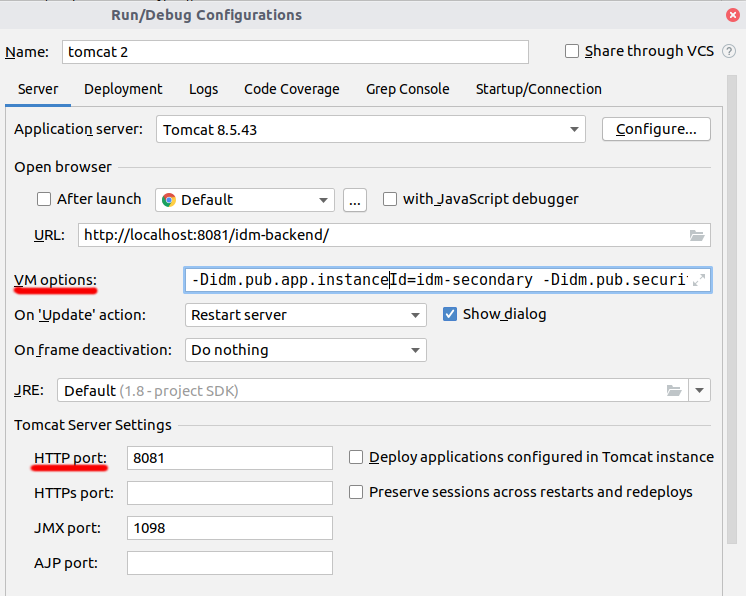
In order tu run second tomcat instance from Idea, you need to start it on a different port. This can be done by copying current tomcat running configuration and tweaking some of its settings.
You need to change two options:
- port - For obvious reasons. You cannot run two applications on the same port.
- VM options - here you tweak CzechIdM in order to run on a same database
-Didm.pub.app.instanceId=idm-secondary -Didm.pub.security.allowed-origins=http://localhost:3002,http://localhost
- idm.pub.app.instanceId - is configuration property which identifies running instance of CzechIdM and enables simultaneous run of multiple instances of CzechIdM on a single database. It basically does not matter what you set here as long as it is unique for each instance.
- idm.pub.security.allowed-origins - this setting modifies CORS allowed origins property. It must be set here, because by default, CzechIdM only allows requests from port 3000 (in dev profile). This will meake sense, when we configure second frontend in the next step.
Starting instances
There is nothing to it. You just select configuration, which you want to run, and pres play button next to it (or a bug, if you want to run it in debug). Note that event though it should not matter, it is safer to run one configuration, wait untill it is completely started and then run second one.
Frontend - Gulp
In order to run second frontend for developer purposes (using gulp watch) we need to point it to our newly created instance, which is running on port 8081. You can do it by providing second configuration file and running it in a second terminal window.
You can do it by copying existing configuration
cd czechidm-app
mkdir config/default-secondary
cp config/default/development.json config/default-secondary/
Now you need to edit config/default-secondary/development.json file and replace
...
  "env": "development",
  "serverUrl": "http://localhost:8080/idm-backend/api/v1",
  "theme": "czechidm-core/themes/default",
...
with
...
  "env": "development",
  "serverUrl": "http://localhost:8081/idm-backend/api/v1",
  "theme": "czechidm-core/themes/default",
...
Starting frontend
In order to start frontend, you should run this command
gulp -p default --stage development
for first instance (comunicating with tomcat at port 8080)
gulp -p default-secondary --stage development
for second instance (comunicating with tomcat at port 8081)
In order to vreify, that everything works, log in to both UIs and check that they have correct instance-id (Settings→Configuration) and that if you for example create new user in one instance, you can see it in the other one.


