This is an old revision of the document!
Systems - AD: Manage users
Introduction
This tutorial will show you how to connect AD as a target system for users (their accounts) from CzechIdM. We will use an AD bundle connector from ConnId.
Before you start
Adding Active Directory connector
First of all, you need to download the connector from Connid (e.g. Connid AD bundle 1.3.4 jar file).
Then add the jar file into CzechIdM folder inside the application server. In case you installed CzechIdM into tomcat by standard installation, the path would be /opt/tomcat/current/webapps/idm/WEB-INF/lib/.
ln -s /opt/czechidm/lib/net.tirasa.connid.bundles.ad-1.3.4.jar /opt/tomcat/current/webapps/idm/WEB-INF/lib/net.tirasa.connid.bundles.ad-1.3.4.jar
Then restart the application server. If you had CzechIdM already running in the web browser, refresh also the web browser window (e.g. Ctrl+F5).
Preparing Active Directory
You must prepare your Active Directory for the CzechIdM integration, mainly:
- Enable LDAPS (SSL-protected LDAP protocol) on the AD. This is vital for production deployments. Also, CzechIdM will not manage users' passwords if not connected to AD through LDAPS.
- Create an user account for the CzechIdM. Identity manager will use this account to perform operations on your AD. Although you can use a Domain Administrator account, we highly discourage it.
- This is simply a Domain User account like any other, but you should create it in different subtree than you want to manage through IdM.
- Grant the CzechIdM user permissions on your AD.
Granting permissions
Suppose we have a domain PISKOVISTE.BCV with corresponding domain components DC=piskoviste,DC=bcv and the IdM application user is CzechIdM (czechidm@piskoviste.bcv).
- CzechIdM needs to
readAD configuration and schema subtrees. In our case:CN=Configuration,DC=piskoviste,DC=bcvCN=Schema,CN=Configuration,DC=piskoviste,DC=bcv
Ability to read schema and sufficient AD configuration should be there by default for an authenticated user. Probably no need to adjust it.
- CzechIdM needs
full controlon subtrees which it will manage. Suppose we need to manage users, groups and computers and that we have a fairly simple setup. We grant full control to those subtrees:CN=Computers,DC=piskoviste,DC=bcvCN=Users,DC=piskoviste,DC=bcvOU=Groups,DC=piskoviste,DC=bcv
Which subtrees you need to grant privileges on depends on the actual directory tree of your Active Directory.
Granting full control to CzechIdM application user
The process is fairly straightforward. Just repeat it for every root of every subtree you need to grant the rights on.
- Open the
Active Directory Users and Computers. - Right-click a container (in our case it was simply marked
Users). - Choose
Delegate Control. - Choose the
CzechIdM (czechidm@piskoviste.bcv)user. - Choose
Create a custom task to delegate. - Choose
This folder, existing objects in this folder, and creation of new objects in this folder. - Tick the
Full Controlcheckbox. This will tick all possible checkboxes in the dialog window. - Check the summary and finish the wizard. Changes are effective immediatelly.
- Repeat for other subtrees as necessary.
For example:
A user is member of some groups, this is noted in his member attribute. If you want to manage the member attribute, the CzechIdM also has to have full access to the subtree with user groups.
However this requirement is not transitive in groups hierarchy.
In AD, you have a Groups\Domain Users group and every domain user is a member of this group. This means that every domain user has a member attribute which contains the Groups\Domain Users group DN.
But the Groups\Domain Users is itself a member of Builtin\Users group.
If you want to manage your users and their group membership, you therefore need to grant full control on Users (to manage users) and Groups (because this is where Domain Users group is) even if you do not want to manage groups themselves. This is because of consistency checks performed by CzechIdM upon account provisioning.
But you do not need to grant anything on Builtin because this is referenced from an user account only indirectly.
Basic configuration
Go to Systems from main menu, then above list of current systems use Add button. On the first page just fill system name.
On the same page you may need to set new password policy in case that your default policy does not meet all requirements of AD configuration. If you do not want to generate passwords for AD accounts, you can skip this step at all.
Connector configuration
In next step switch to menu Configuration of your new system. At first, you need to chose connector, which in this case is net.tirasa.connid.bundles.ad.ADConnector(connId). It will open specific configuration for that choice.
Thereafter fill important fields.
Example configuration for our local AD:
- Server hostname - hostname or IP
- Server port - usually 389 or 636
- Failover - an optional list of other domain controllers used in the case that the primary server is not available. Use URL format
ldaps://123.456.789.012:636. - Principal - login of the user with admin privilege that CzechIdM will use for the connection. DN of the user should work too.
- Principal password - password of the administrator user
- Root suffixes - the list distinguished names of the roots that connector uses for managing users. If you do not want to manage some account, it is advised not to include them in the Root suffixes. When you configure the system for the first time, root suffix should lead to the top container (e.g. DC=aktest,DC=local), so the system schema can be correctly generated.
- User search scope - manage users in specified container or subtrees. Usually subtree
- Entry object classes - only objects (accounts) with object classes specified there will be managed. Each object class on new line, no comma or another separator. Usual values: top, person, organizationalPerson, user.
- Base contexts for group entry searches - container in AD where the groups are located. If the groups are in different container then people and the group container is not under the path which is in "Root suffixes". You need to put it here, otherwise connector will not be able to load users groups
- Base contexts for user entry searches - usually the same as "Root suffixes".
- Group members reference attribute - usually "member", use this if you want to manage group membership of user accounts
- pageSize - this option is only available if you use connector that is customizes by BCV Solutions. Set it to default (100), if you ask for more than the limit for AD is, you will get an error.
- Uid Attribute - this is one of the most important option. It defines the primary key/UID of the account. Attribute values will be stored in CzechIdM for each account. Must be unique and should not change. It is strongly advised to use "sAMAccountName", since connId connector has some problem with returning this specific attribute if mapped by other means.
- Object classes to synchronize - usually the same as "Entry object classes"
- Specified attributes to be returned - default "ldapGroups" and "sAMAccountName"
idm.sec.acc.provisioning.allowedAutoMappingOnExistingAccount=false
(in create action you have to send random String, because UID cannot be null and objectGUID will be obtained after create of user/group)
Scheme
For next step, go to menu Scheme on your system.
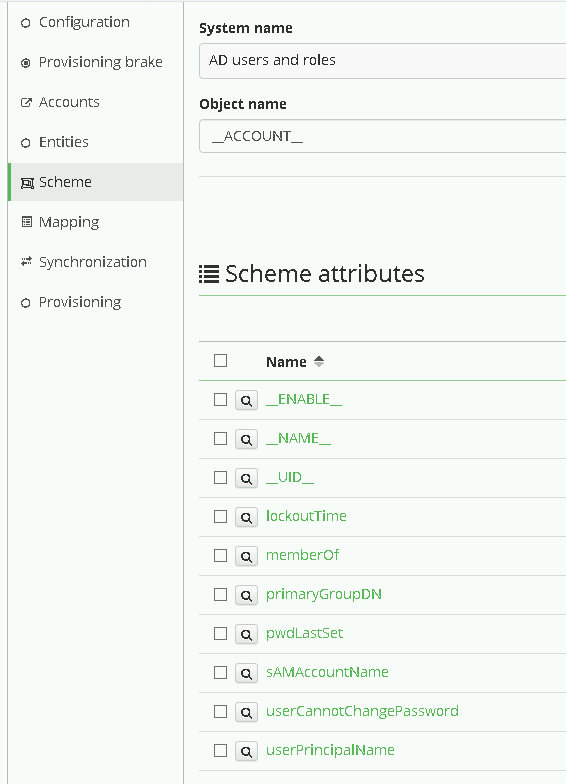
You can let CzechIdM generate a scheme for you by clicking on Generate scheme button and that is also the preferred way. For MS AD, the connector usually creates 3 object types. \ACCOUNTS\, \ALL\, \GROUP\.
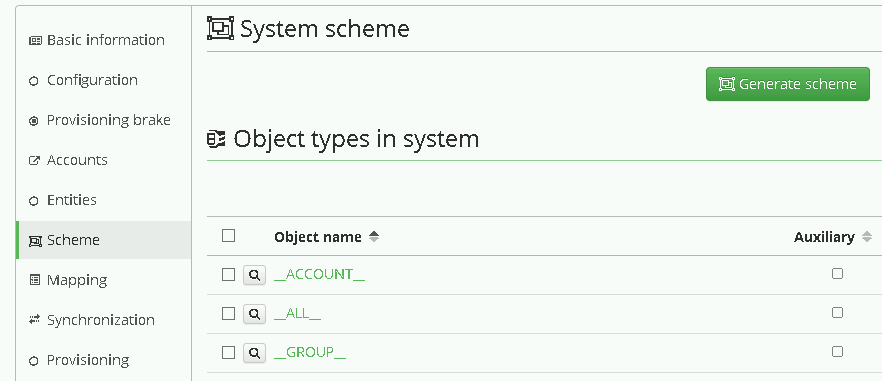
For user management, we will use ACCOUNT. Click on the detail of the object type and check that the scheme attributes list consists of all attributes you want to manage in AD. If the list doesn't contain any attribute, check that Root suffixes in the system configuration contains the value of the top container (so the connector can read the schema definitions).
If you are connecting AD for the first time, it is a good idea to check some minimal set of attributes that allows you to create an account, which is usually:
- sAMAccountName - this attribute is not sometimes generated by default. If so you must create it manually. Use the button Add, fill in the name "sAMAccountName", type "java.lang.String", able to read, update, create and returned by default.
- \ENABLE\ - if you want to allow disabling a user in AD. Sometimes this attribute is not generated by default, so you can create it manually.
- \NAME\ (synonymous to DN, hard-coded in the connector).
If you want to set everything by yourself:
- Use button Add to create a new scheme. For users, you need to name it "\_\_ACCOUNT\_\_", because it is a Connid constant
- Add all attributes that you want to work with. As a minimum, the "\_\_NAME\_\_" and "sAMAccountName" attributes should be mapped.
- Set all attributes as Able to read, update, create.
Mapping
Now go to menu Mapping. There you must set, which attribute from scheme is mapped to which attribute in CzechIdM.
At first set:
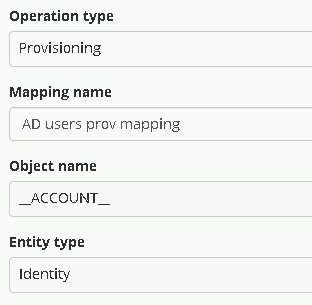
- Operation type: Provisioning - we want to manage data in AD from CzechIdM
- Object name: \_\_ACCOUNT\_\_ - this is a standard type of scheme object in AD
- Entity type: Identity - this entity type in CzechIdM we want to provision
- As Mapping name set whatever you want, for example AD users prov mapping.
Then map scheme attributes to entity attributes as described below:
- sAMAccountName
- Name - sAMAccountName
- Identifier - true
- Entity attribute - true. Means that the attribute will be filled from basic Identity attribute set.
- Entity field (selectbox) - User name
Other options may stay with default values.
\_\_ENABLE\_\_, mapping configuration is almost the same as \_\_UID\_\_, but do not set it as identifier. Map this schema attribute to entity attribute "Disabled". You should also add transformation to the system, because CzechIdM holds the attribute "disabled" and AD has attribute "enable". So the transformation should return opposite value of the attribute in CzechIdM. To do so, click on the Insert script button in "Transformation to system" window and find the script getOppositeBoolean. This should fill the window with the script call.
If you also want to create entities in AD, which is probable, map \_\_NAME\_\_ attribute that holds the DN of the account in AD. The configuration of the attribute may look like:
- Attribute in schema - \_\_NAME\_\_,
- Name - DN(\_\_NAME\_\_)
- Entity attribute - true
- Entity field - user name. In case that the DN on AD consists of the login of the user. Otherwise, you should choose other attribute or EAV.
- The form of the DN varies on each instance of AD, so there usually will be some transformation to system like
return "CN=" + attributeValue + ",OU=employees,DC=yourcompany,DC=com". Of course your tree can be more complex, in that case you should follow some of our tutorials.
Password mapping
Role for AD
When the mapping is set, the last step is to define a role in CzechIdM, that grants the user the account in AD. Prepare a new role in CzechIdM only with basic attributes. Name should be sufficient.
If you want some more options, follow How to create a role.
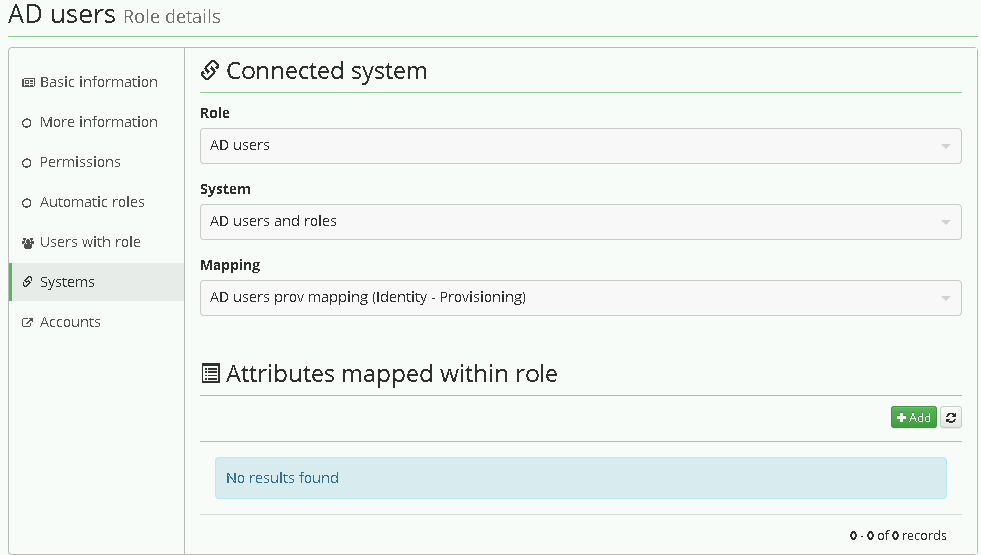
Then in the role detail, go the the menu tab Systems, add a new system and choose previously created one - "AD users and roles". Then also choose your provisioning mapping, there should be only one, and save it.
From now on, every time user gets the role, it is provisioned into the connected system AD. You can see that on users detail menu tab "Provisioning" or in the audit "Provisioning"
Finally, go to menu Provisioning and add new one set its Name and these fields:
- Allowed: true
- Set of mapped attributes: Select mapping from previous step.
- Correlation attribute: \_\_NAME\_\_
You can leave the rest of configuration at the default values.
Group membership
If you want to add a user to an AD group via CzechIdM, you need appropriate Role there. So create a role that is almost similar to AD - Users above. Give it some better name that represents the group in AD, good idea is to use sAMAccountName or CN e.g. CRM basic user.
In the system AD - users schema setting, you need to have a special attribute defined that add the user to the group. The attribute is usually ldapGroups. Be sure, it can be read,create,update,delete. Attribute is multivalued. In the system configuration tab, there are some configuration properties, that must be set in order to allow group membership management.
- Group members reference attribute - usually member. This represents the name of the attribute in AD that is present in Group. Its value is usually a DN of the user in the group.
Then continue to AD - users Mappings and edit provisioning mapping. Add there a ldapGroups attribute. It is not filled from any identity attribute and has no transformation. (It will be filled from the role). Since the attribute is multivalued, its filling strategy must be either MERGE or AUTHORITATIVE MERGE.
Get back to your role CRM basic user. In the tab Systems add a system AD - users and roles, save it. Then add an attribute that will be filled by this role - ldapGroups. Again choose the filling strategy MERGE or AUTH.MERGE. Then add a transformation that is the value of DN of the group in AD ' " ' sign on each side of the text.
Thus every user that has the role assigned is added to the group with provided DN via ldapGroups attribute.
For managing group membership in multi domain AD environment follow this tutorial
Tips & Tricks
Distinguished Name (DN), Common Name (CN)
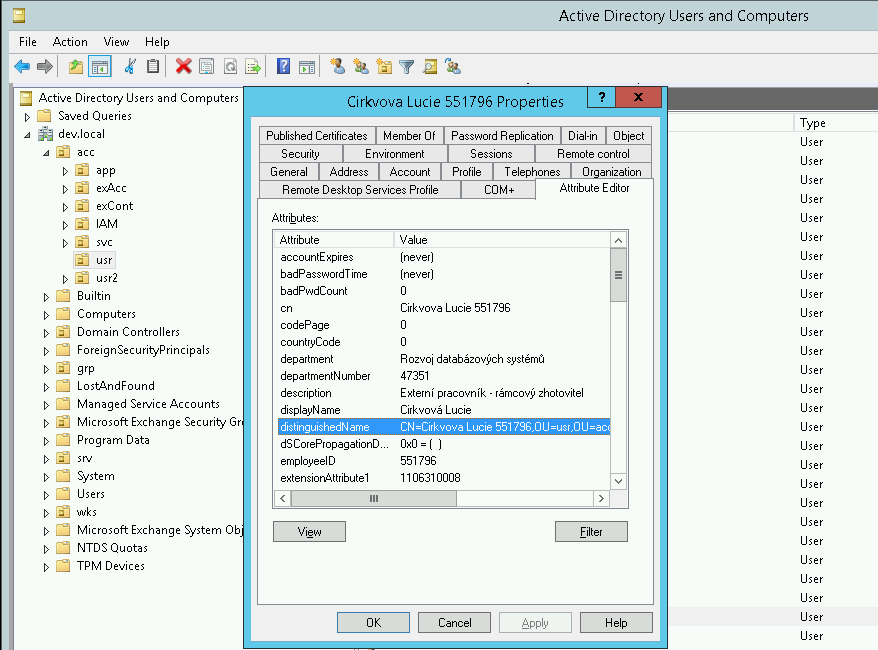
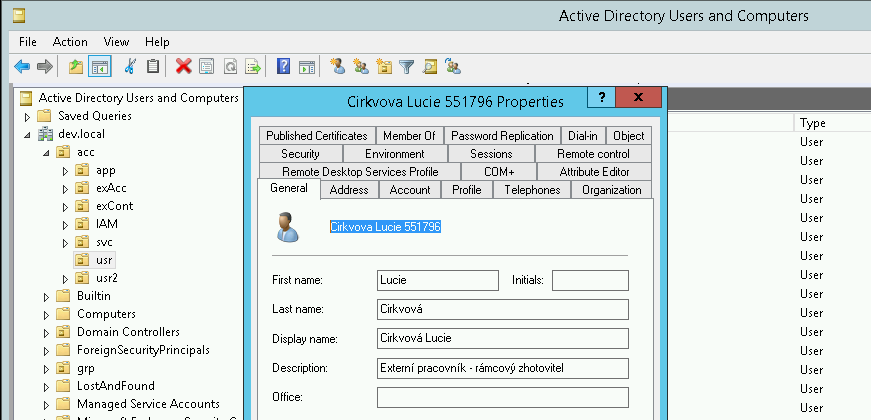
You can easily find DN of a user account with the help of Active Directory Users and Computers in your Windows server. Open the user's detail and switch to the tab Attribute Editor. You can see here the attributes in the same format as IdM sees them.
Active Directory Users and Commputers → View and select Advanced features.
Moreover, CN of the user account is the same as Name so you can see it on the first page of the user's detail next to the icon.
ldapGroups not returned
If you are running on a Windows server, the 'ldapGroups' in 'Specified attributes to be returned' has the wrong value 'ldapGroups\r' (this is only visible in Audit). The solution is to remove the value in 'Specified attributes to be returned' and write it again manually.
Connection via SSL not working
If you just imported root certificate to IdM truststore, but SSL connection to AD is still not working try following method to find which server hostname you should use.
Configure connection via SSL to AD in Apache Directory Studio during connection you will see this window:
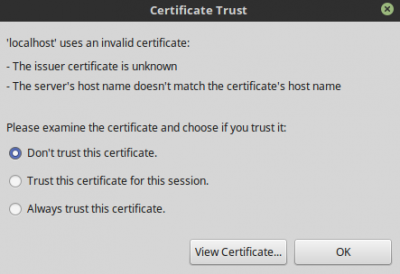 click on View certificate → tab General → field Issued To → Common name(CN) and use this value as server hostname.
LdapErr: DSID-0C0907C5
If you see this error when reconciliating AD groups:
org.identityconnectors.framework.common.exceptions.ConnectorException: javax.naming.OperationNotSupportedException: [LDAP: error code 12 - 00000057: LdapErr: DSID-0C0907C5, comment: Error processing control, data 0, v1db1]; remaining name 'OU=BohemiaEnergy,DC=bohemiaenergy,DC=local'
the likely cause is that some groups have many members. AD has a property MaxPageSize which is probably set to lower than necessary (default is 1000). Increasing the value to an arbitrary large number (30000) helped in our case but only AD admin can change this.
Failover
The configuration property Failover is used when the primary server (configured in the Server hostname) is unavailable. The attribute contains a list of AD servers that connector can use.
Please note that this property is not used in the case that the primary server is accessible on the given port, but there is some other problem with the communication (e.g. the credentials are incorrect).
The value of this property must be a proper URL, e.g. ldaps://some.hostname:636.
Video Guide
How to create role for AD group - czech language
