Hub Admin
Introduction
Hub Admin is an application for managing the Hub. Here, you can adjust the Hub's appearance, default language, applications for the app launcher, their current state, which IdM roles are allowed to see them, and group applications into application groups.
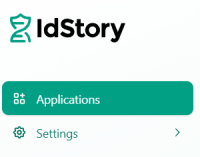
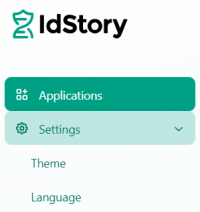
Hub Admin is organized into modules. Each module is accessible by its item in main menu. There are two modules now, Applications and Settings.
 In the case the UI doesn't look as expected after performing some action or you cannot find something described in this guide, please try to reload the app (F5).
Applications
About module
Applications for the app launcher can be managed in the module "Applications" accessible via main menu item "Applications":
This module serves to organize applications in app launcher and to manage their access rights. To achieve these goals, there are two entities: application groups and roles.
Application groups
Application groups are a way to display related applications together (e.g. office apps, accounting apps, IT development apps). They don't define who can see them, so by creating for instance a "management apps" group you just create a list of management related apps but it doesn't mean only managers will see them. Which user can see each application is defined by roles.
Application group is displayed to a Hub user in case there is at least one application in it, that the user has access to.
Application groups are ordered by name, applications within application group are ordered by priority and then by name.
Roles
Every application has one or more IdM roles which allow user to see it in the app launcher. In case there are more roles defined, user with any of these roles can see the application in any application group the application belongs to and in the "All apps" "group" too.
There is a default role user which every Hub user has, so an application with the role user is visible to everyone.
Example
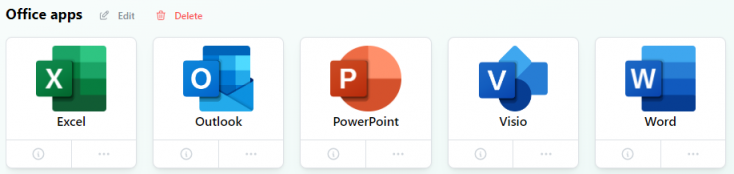
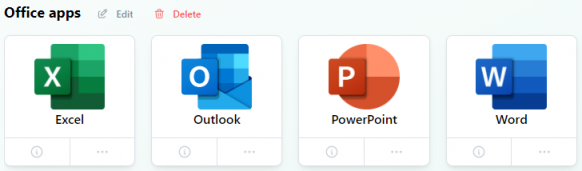
Let's create an application group called "Office apps". It will have the applications Excel, Outlook, PowerPoint and Word accessible with the role user and Visio accessible with the role manager.
Hub user with manager role will see all the apps, because he has the manager role set explicitly and also has the user role which every Hub user has by default:
Hub user without the manager role will see just applications with the role user:
User guide
Application groups
An application group allows you to group related applications. It has only one attribute - name, which is required.
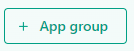
Create application group
To create a new application group, click the button "App group" located in the top right corner of the Applications module page:
Dialog appears where you define app group name:
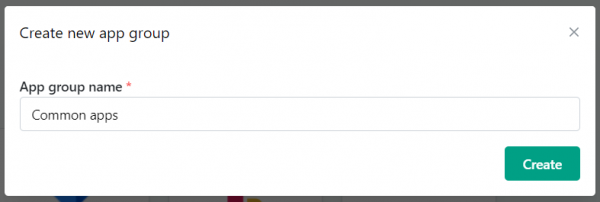
After filling the required app group name, the Create button activates and by clicking on it, you confirm app group creation.
Edit application group
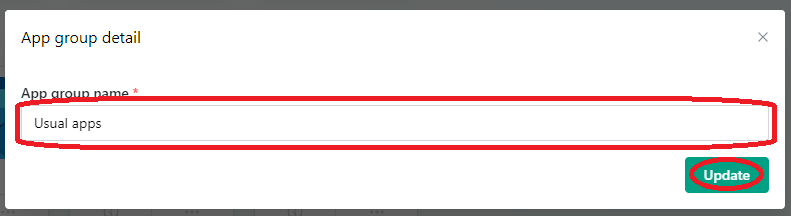
To get the "update app group dialog", click on the Edit link next to the application group name:
![]()
Update app group name and confirm the change by clicking the Update button (the dialog will be closed automatically):
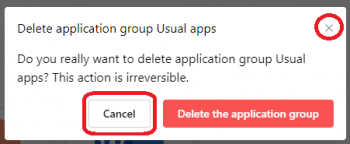
Delete application group
To completely remove an application group, click on the Delete link next to the application group name.
![]()
Confirm the removal by "Delete the application group" button.
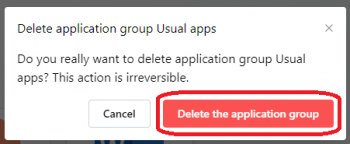
You can cancel the removal by Cancel button, X button or clicking anywhere outside the dialog.
App group is removed without its apps, these can be still found in "All apps" "group".
Applications
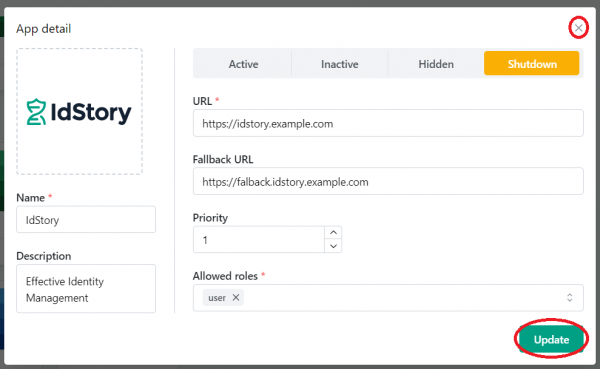
For an application you can define several attributes:
| Attribute | Description | Required |
|---|---|---|
| Allowed roles | IdM roles allowed to see the application in app launcher, default value user means everybody can see the app | Yes |
| Description | Short application description | No |
| Fallback URL | Application URL in case of shutdown state | No |
| Logo | Application logo displayed on the app card in app launcher. The default is the IdStory logo, which is used if no user-defined logo is provided. | No |
| Name | Application name displayed on the app card in app launcher | Yes |
| Priority | Application priority, apps within app group are sorted by priority (apps with higher priority are displayed before apps with lower priority) and then by name | Yes |
| State | Application state, possible values in the table below | Yes |
| URL | Application URL in case of active state | Yes |
Application states:
| State | Meaning |
|---|---|
| Active | App is displayed in app launcher and clicking it redirects to app URL |
| Hidden | App is not displayed in app launcher, it's visible only in administration |
| Inactive | App is displayed in app launcher but is not clickable |
| Shutdown | App is displayed in app launcher and clicking on it redirects to the app Fallback URL |
Create application
To create a new application, click the App button located in the top right corner of the Applications module page:

A dialog appears where you can fill in the app attributes and confirm it by clicking on the Create button:
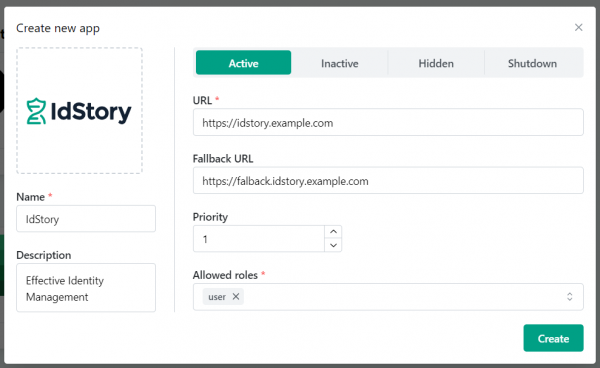
The logo can be drag&dropped into the logo placeholder area or chosen from disk after clicking in that area.
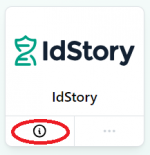
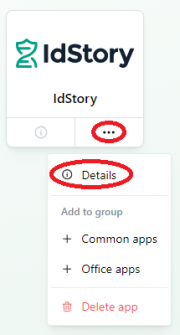
Edit application
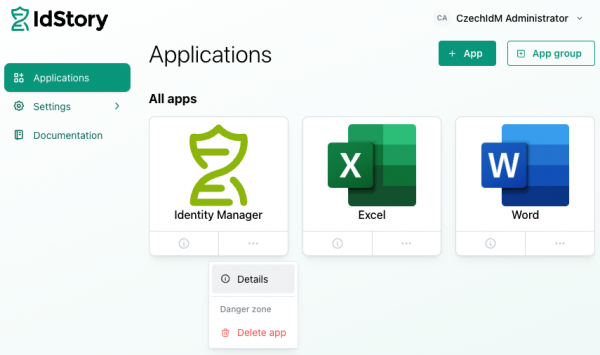
To get the "update app dialog", click on the detail icon on the app card:
or select the Details menu item in the app card action menu:
Update app attributes as needed, confirm changes by clicking the Update button and close the dialog by using the X button (or you can just click anywhere outside the dialog).
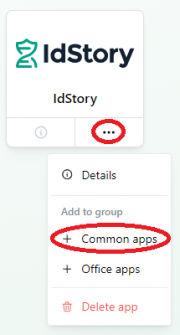
Add an application to a group
To add an application to a group, click on the desired group in the "Add to group" section of the app card action menu:
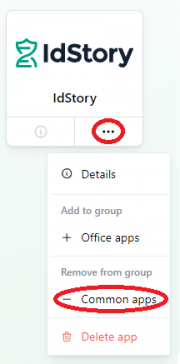
Remove an application from a group
To remove an application from a group, click on the desired group in the "Remove from group" section of the app card action menu:
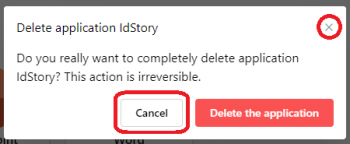
Delete an application
To completely remove an application, click on the Delete app item in the app card action menu.
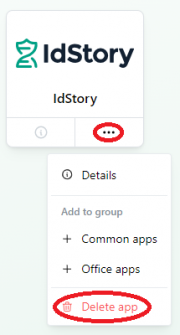
Confirm the removal by "Delete the application" button.
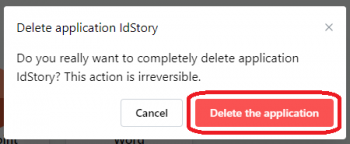
You can cancel the removal by Cancel button, X button or clicking anywhere outside the dialog.
Setting up roles to use in IdStoryHub
IdStory HUB uses roles In order to limit access to certain appliactions to specific user groups. This guide walks you through the process of such configuration.
Creating role in IdM
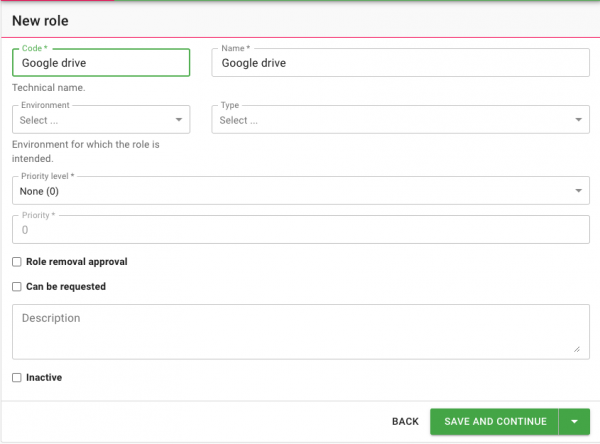
First, you need to create role, that would be assigned to all users, who should have access to a given app in HUB. Lets say, we want to limit access to Google drive application.
- Create a role
- Go to IdStory IdM and log in as user, who can create and assign roles
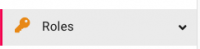
- Go to “Roles”
- Click to “ADD”

- Fill out “Code” and “Name” attributes and click “SAVE AND CONTINUE”
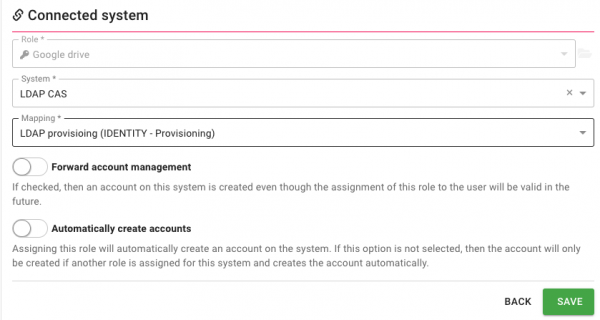
- Make newly created role provision data to LDAP
- On a detail of our newly created role, click on “Systems”
- Click “ADD”
- Fill the displayed form according to picture bellow and click “SAVE”
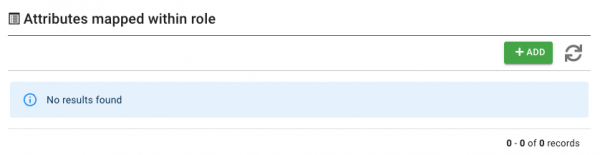
- Now the empty table with mapped attributes is displayed. Click “ADD”
- Now set mapping for iamUserRole attribute according to image bellow
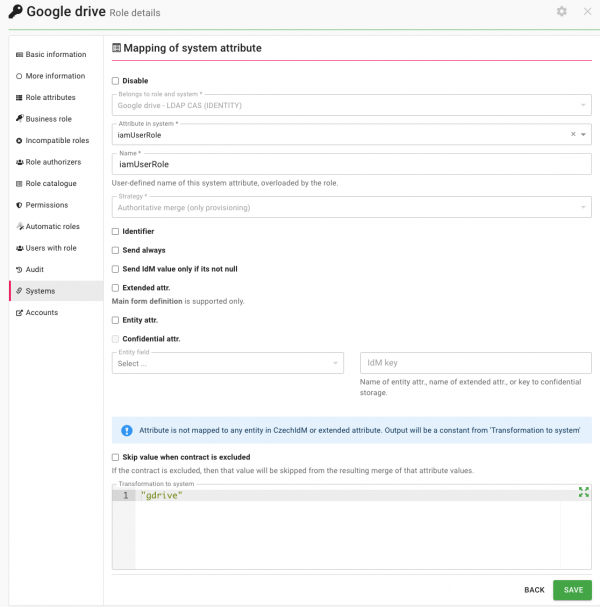
- Click “SAVE”
- Assign role to users
- Now you need to assign role to users, who should be able to see Google drive app in IdStory HUB
- There are many ways to do so. You can read about it here: https://wiki.czechidm.com/devel/documentation/roles#automatically_assigned_roles_by_organization_structure


Setting up role in IdStoryHub
- Log in to admin interface of IdStory HUB
- Go to URL/hub/admin and log in
- Add / Google Drive application
- Click “+ App” or “…” and then “Details”
- Type “gdrive” into “Allowed roles” field
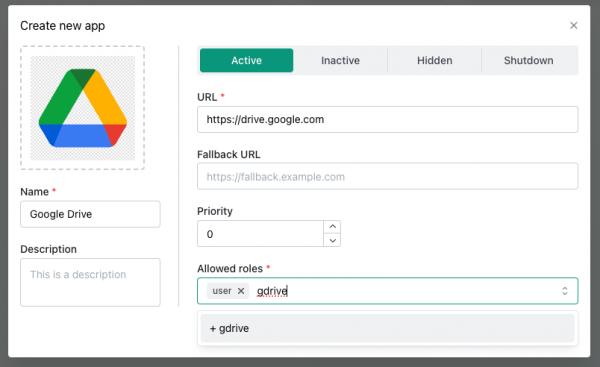
- Click “+ gdrive”
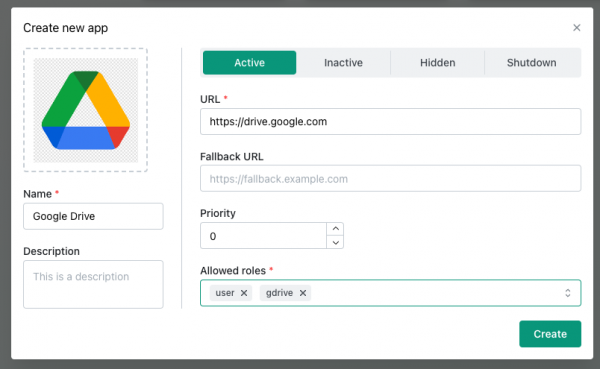
- Click “Create” or “Update”


From now on, the Google Drive app will be shown only to admin and users with “gdrive” role
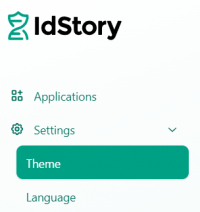
Settings
About module
In this module you can adjust the Hub appearance.
User guide
Theme
In this section you can change the Hub logo and color palette.
Update logo
Drag the new logo onto the logo image area or click on that area to select a logo from your HDD. Then confirm the change by clicking on the "Save logo" button:
![]()
If you upload a wrong image and want to take this action back, you can do it by clicking on the "Cancel" button (it is possible only before the logo change is confirmed):
![]()
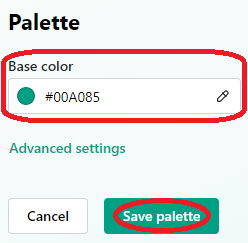
Update palette
Here you can customize the color palette used in the Hub. The easiest way to do it to select the base color and confirm your choice by "Save palette" button, colors used in application will be derived from the base color:
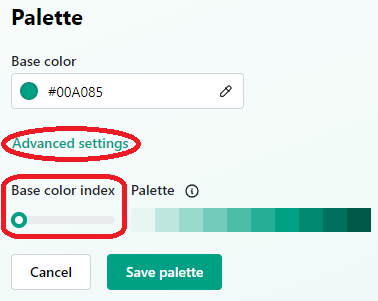
You can adjust the palette by setting the base color index under Advanced settings. Slider start "Auto" means the position of the base color will be set automatically based on its lightness, other positions define its position explicitly so the palette will be overall lighter/darker:
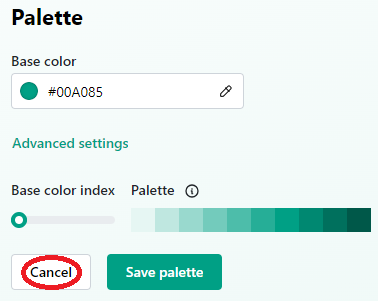
You can cancel any change by clicking the "Cancel" button (it is possible only before the palette change is confirmed):
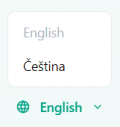
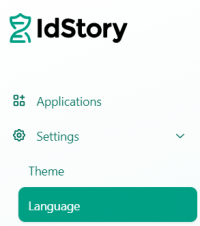
Language
In this section you can change the default language.
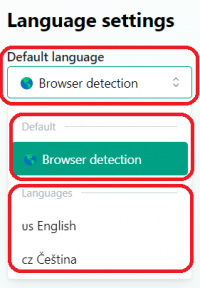
Change default language
There are two options for user default language. The first and default one is to detect it from browser settings (with a fallback to english in case the detected language isn't supported by the Hub). The second one is to force it by explicitly selecting it here. You can find both options in the Default language select list:
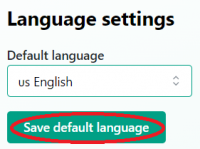
You can confirm your selection by clicking the Save default language button:
This is the way to set the default language for all users. Every user can override this setting by selecting another supported language from the select list located in the bottom left corner: