This is an old revision of the document!
Virtual system - adding or deleting managed extended attributes
Introduction
After you've connected a virtual system to CzechIdM (see the tutorial here), you may need to add some extended attributes which are present in the connected system. To achieve this, make sure you have 1) connected the virtual system, 2) have admin set as the implementer, and 3) are logged in as admin.
Let's assume that the managed system contains the information about the building in which each person has their office. To add this information to the IdM, we have to follow several steps.
Step 1: modify form definitions
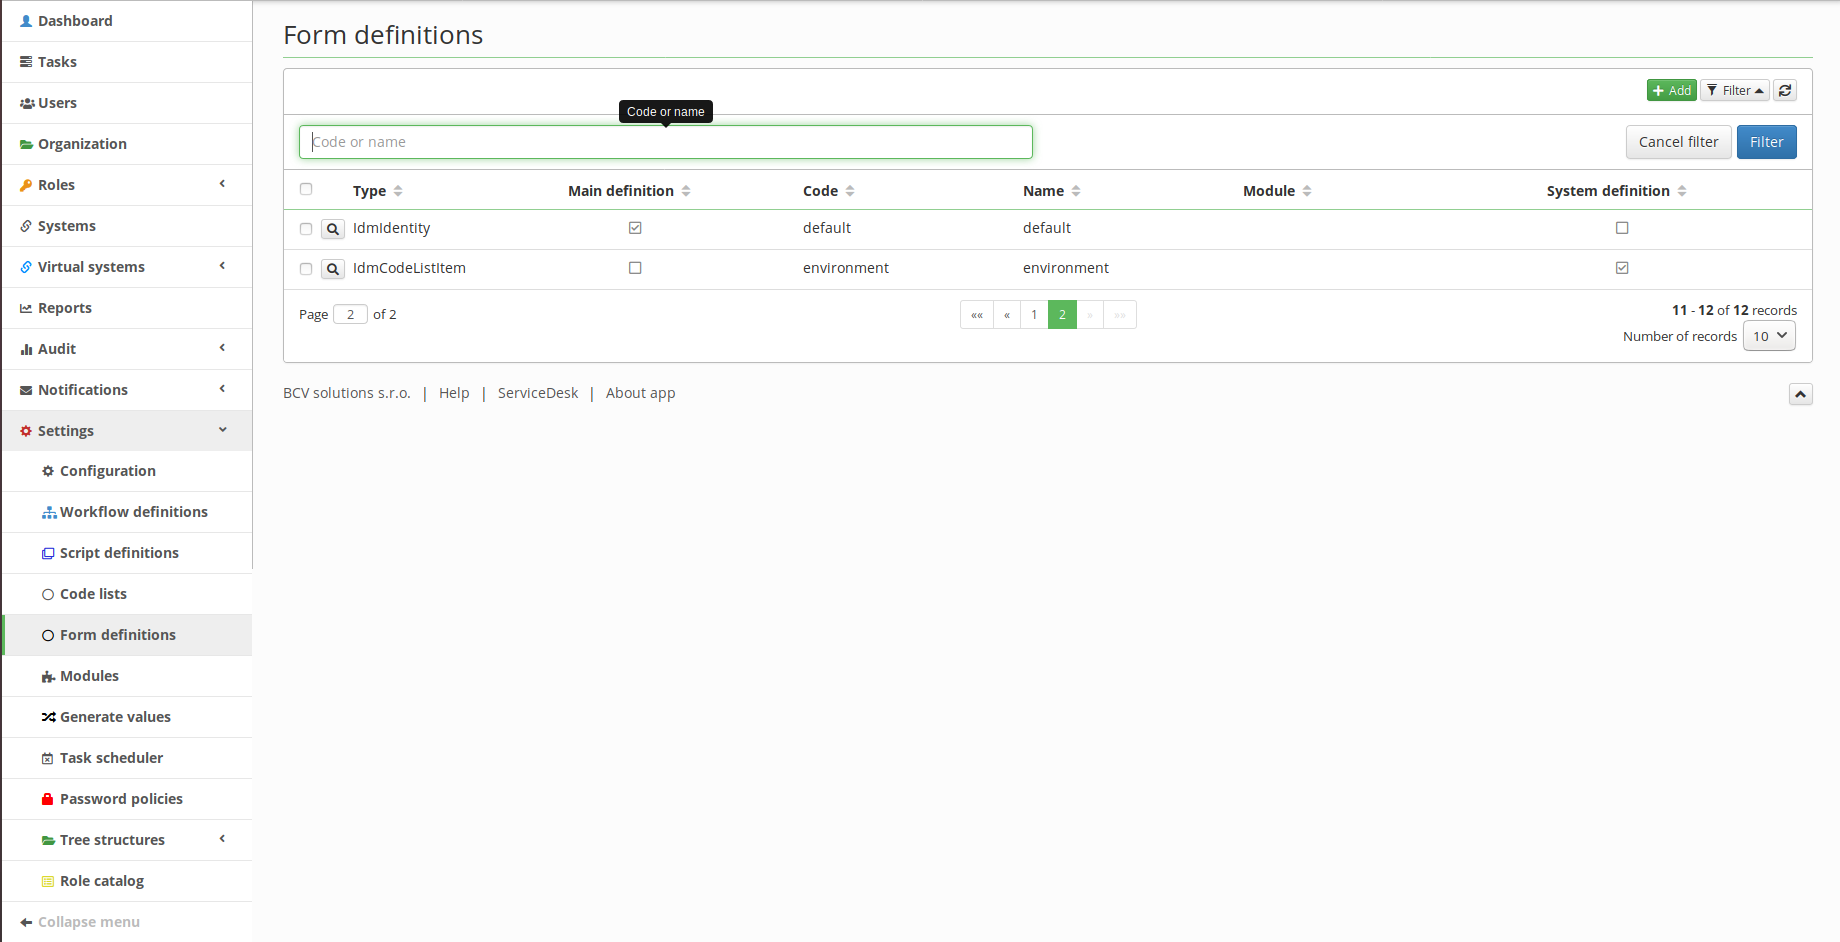
First, click on Setting in the left panel and choose Form definitions. In the list, find idmIdentity and open it (with the magnifying glass). After that, select Form Attributes and click the green Add button. Only two fields are required: Code, and Name. Make sure you change the Attribute type from default (Short text) if the type is different. You can also set e. g. a default value or a validation using regular expressions if it makes sense in the specific case. Once you've finished, click Save.

Step 2: add the attribute to configuration
Click Virtual systems in the left panel and select List. Open you virtual system and select Configuration. Add your attribute (building) to the list of attributes and click on save.

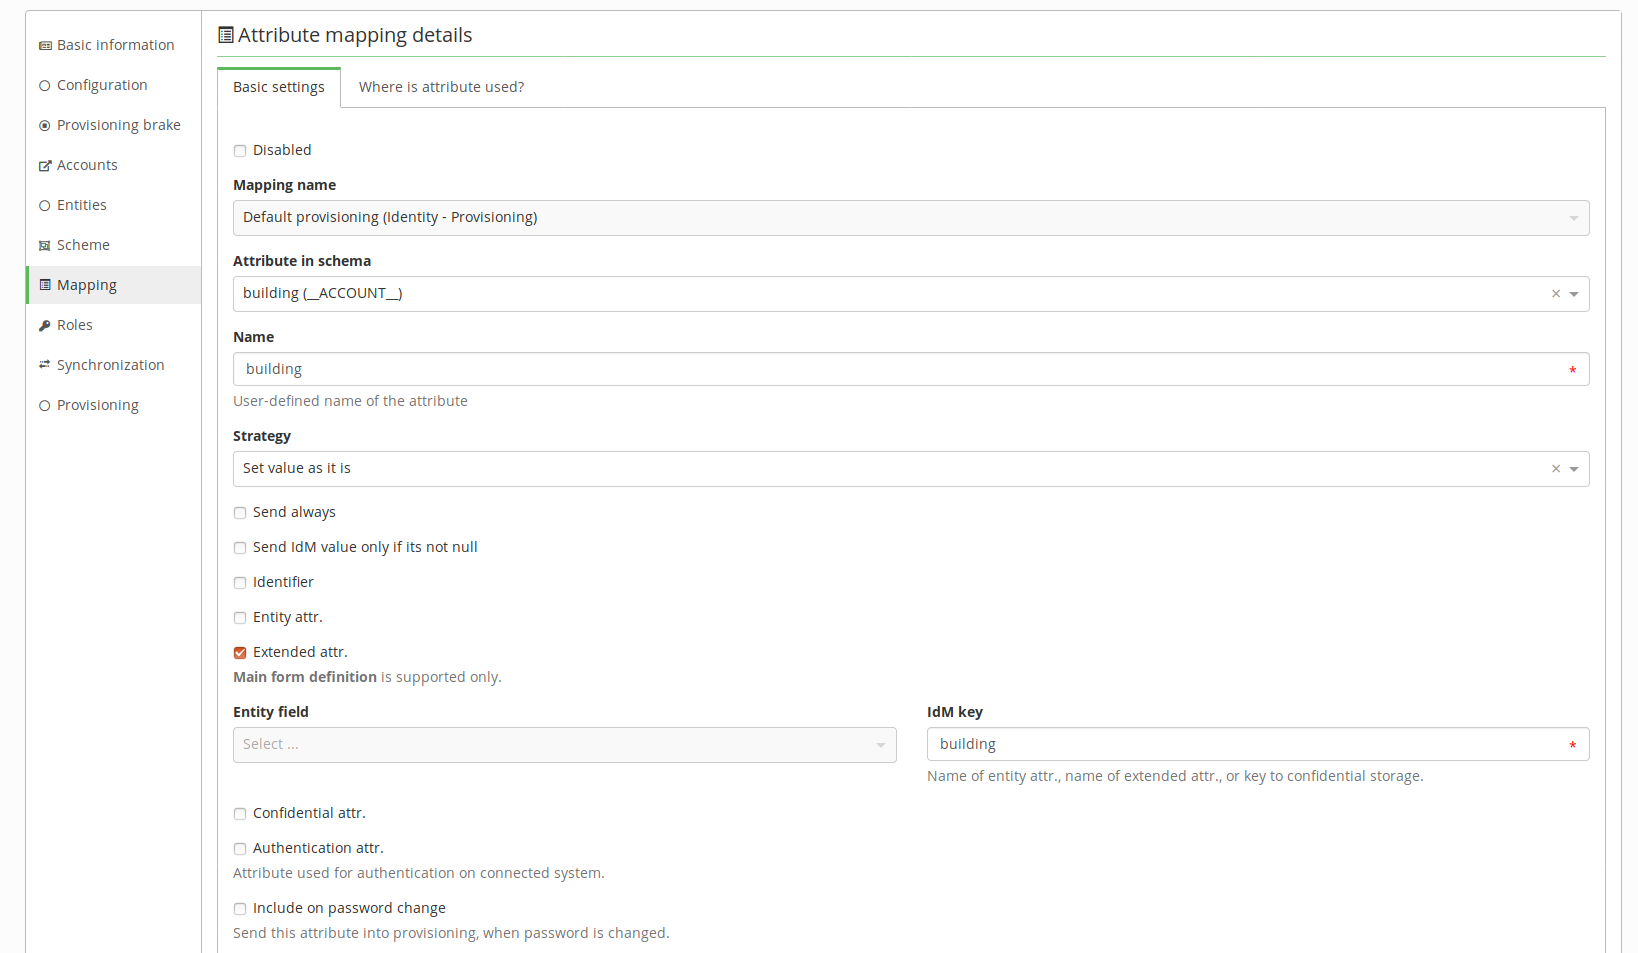
Step 3: modify scheme and mapping
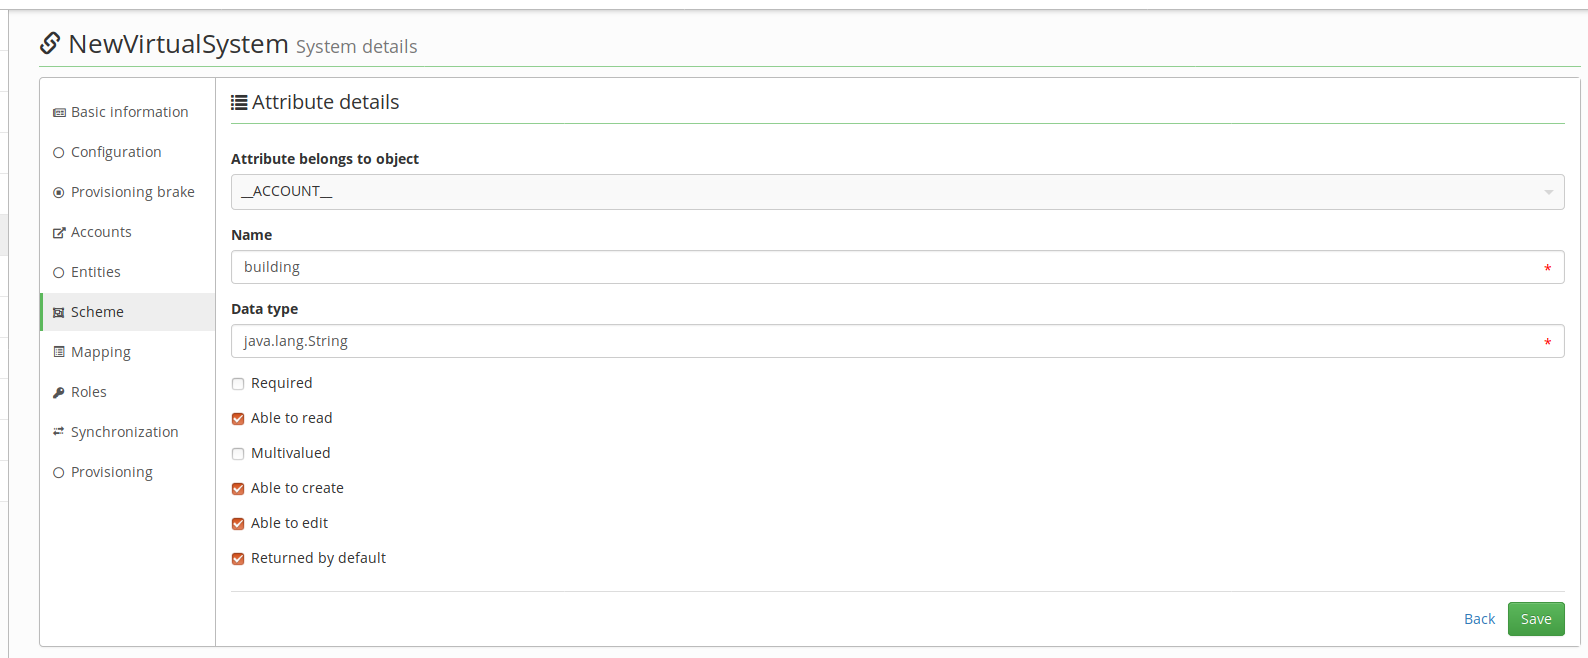
Click Scheme in your virtual system. You should only see ACCOUNT; open it with the magnifying glass. In Scheme attributes, click the green Add button. In here, fill out the name of the attribute (building), its data type (java.lang.String in this case), and check boxes for Able to read, Able to create, Able to edit, and Returned by default. Click save.

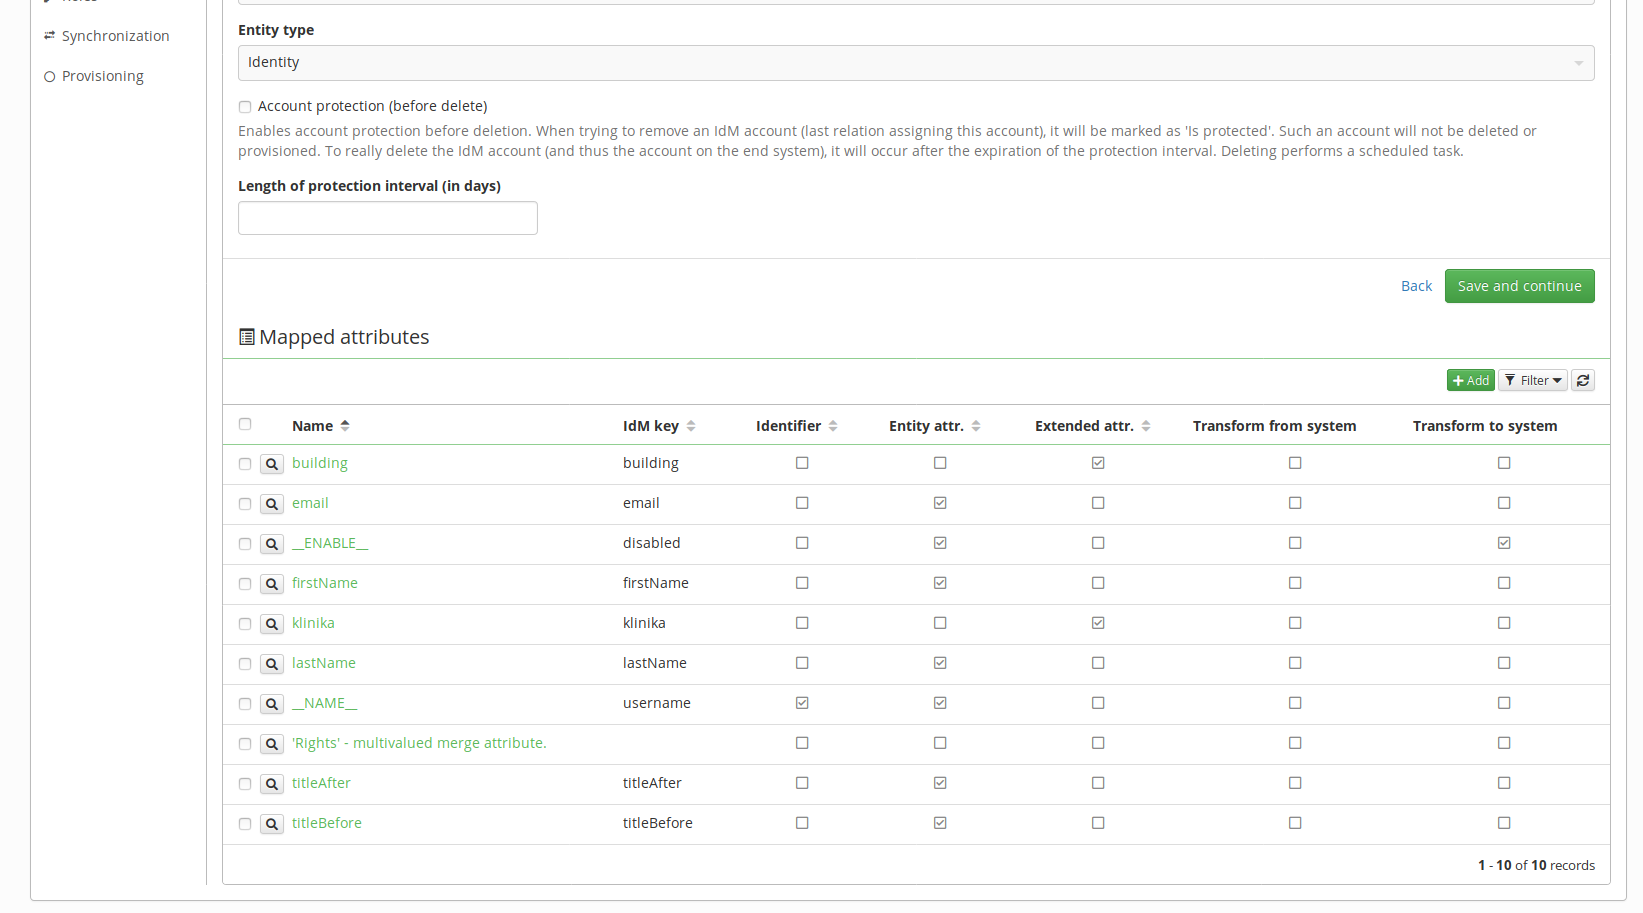
After that, we have to add the attributes to the mapped attributes. Click Mapping and open Provisioning where you will see the list of mapped attributes. Click Add. Select the Attribute in schema (building). Check the box Extended attr. and fill out the desired IdM key. Click Save.
Step 4: check the functionality
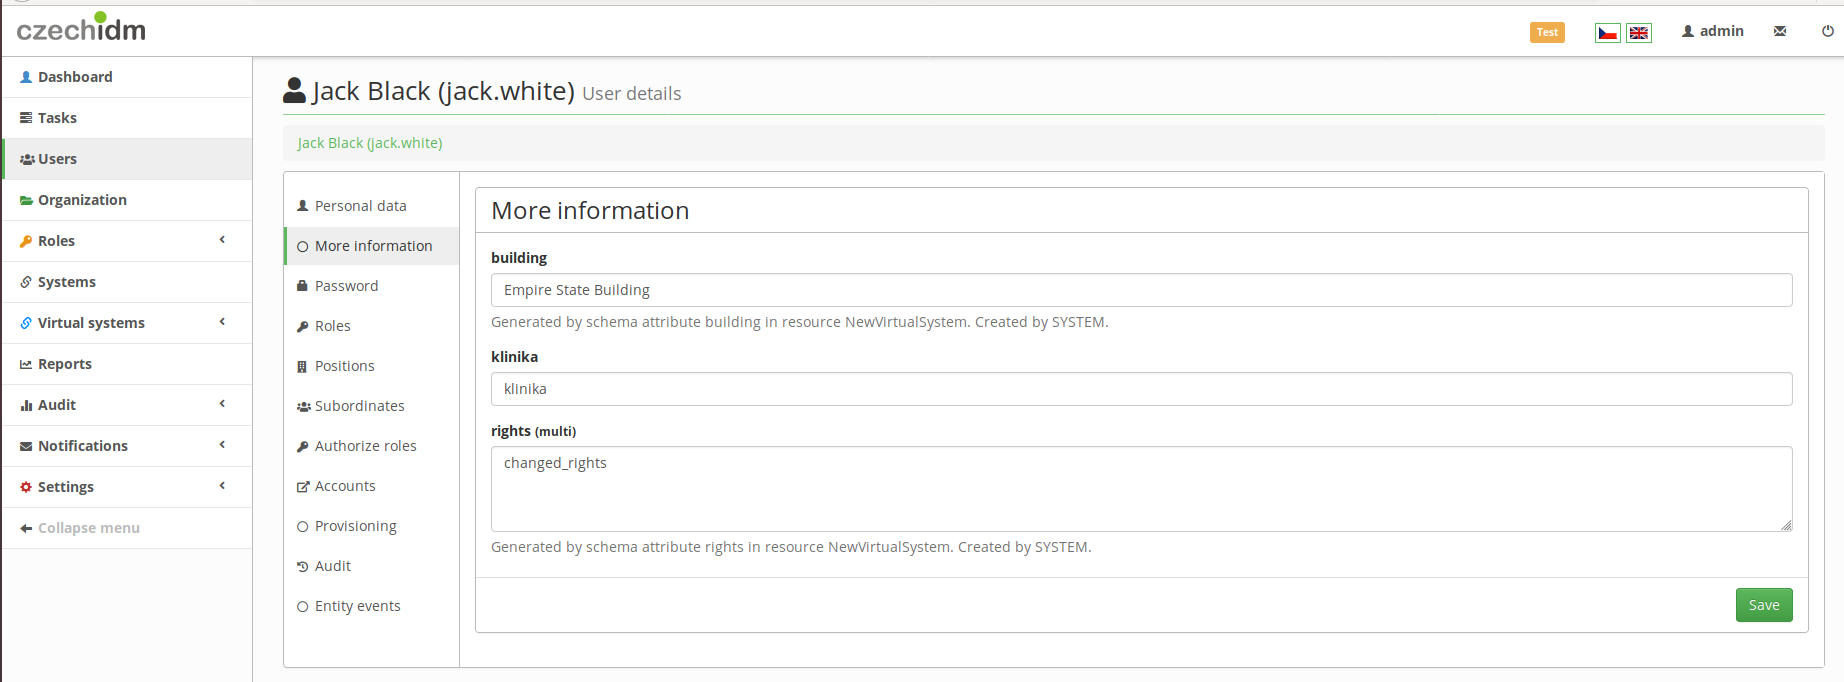
If you open the details of a user with a role defined in the virtual system (with the magnifying glass), click Show full details and select More information, you should now see that you can set the value of the attribute (building). Try to fill in some test information and click Save.
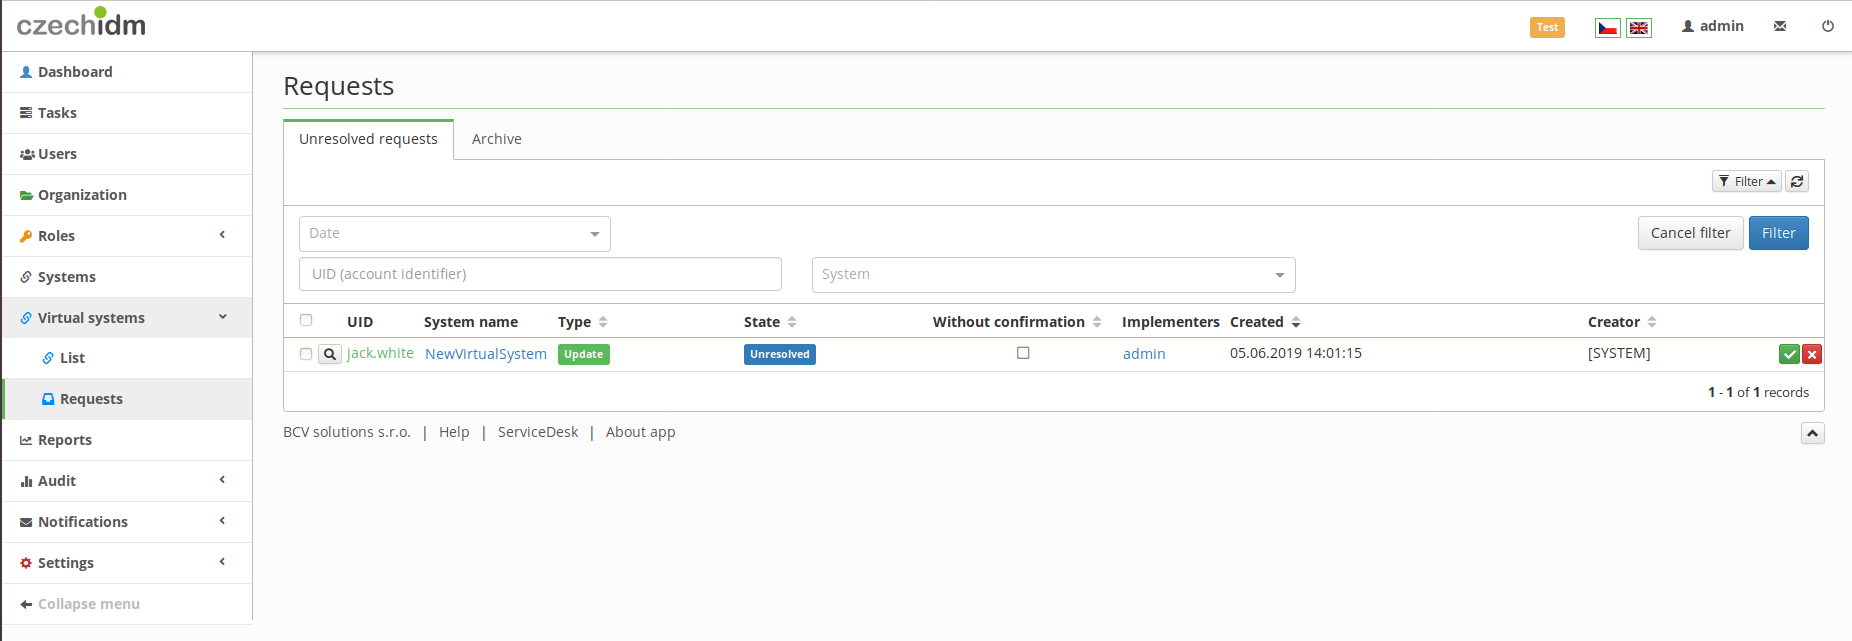
Now go to Virtual systems in the left panel and click Requests. You should now see that there is a new request. If you open it you will see in the detail that the attribute has changed. Also, if you click Notifications and Notifications history in the left panel, you will see that the implementer has been notified that they should make the change in the system they manage and then confirm they've done so in the IdM.