Provisioning brake - create and configure
If you want to control some operation like create, delete or update on your system and you want to prevent, for example, deleting too many accounts at one time, the provisioning brake is the best tool for you. You are able set the warning and the disable limit for each operation. After the number of processed operations exceeds the disable limit, the system is automatically blocked for this operation. In this tutorial, we will show you how to simple create the provisioning brake configuration for a specific system.
The detailed information about the provisioning brake can be found in the Admin tutorial.
01 - Create the provisioning brake configuration
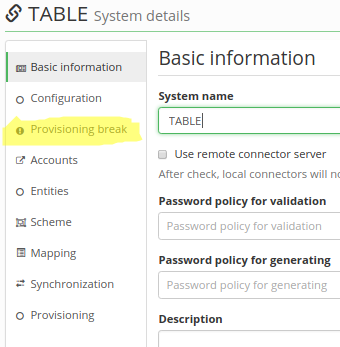
When you display the detail of the specific system, there is an item called Provisioning brake in the left menu. Click on this menu item (see picture).
On the provisioning brake tab, there are displayed all configured provisioning brakes for this system. Global provisioning brake configuration is also included. Global provisioning brake is tagged by the gray label with the text Global configuration: 
In the top-right corner, you can find the button for adding a new provisioning brake configuration:  . Please click at this button. The detail of the provisioning brake configuration will be displayed, see the picture.
02 - Provisioning brake configuration attributes
Now you must configure the provisioning brake. For the basic use case, set the following parameters:
- Type of blocked operation - which operation you want to control
- Period - period (in minutes) for evaluating the warning and the disable limit
- Warning limit - the number of operations after which the warning notification is sent
- Disable limit - the maximum number of operations processed by CzechIdM. When exceeding this limit, the operation will be blocked.
All other attributes are explained in the Admin tutorial.
03 - Configuring the recipients
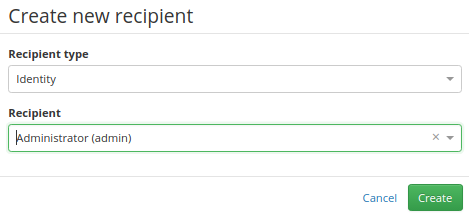
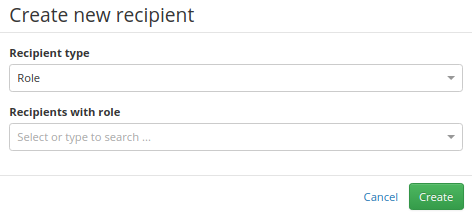
Finally, configure the recipients of the notifications, which will be sent if the provisioning brake takes action. The recipient can be an identity or a role. You can add a new recipient by modal window that defines the type of recipient (identity or role) and the specific recipient, which you will choose in the select box.
Identity recipient:
Role recipient:
If you choose a role as the recipient, the notification will be sent to all identities that have this role assigned.


