Systems - Ldap: Roles provisioning
This tutorial is intended as a guide for administrators that want to provision roles from CzechIdM to Ldap.
You will learn
- how to connect an Ldap system for role provisioning
- how to propagate just those roles we want
Create system
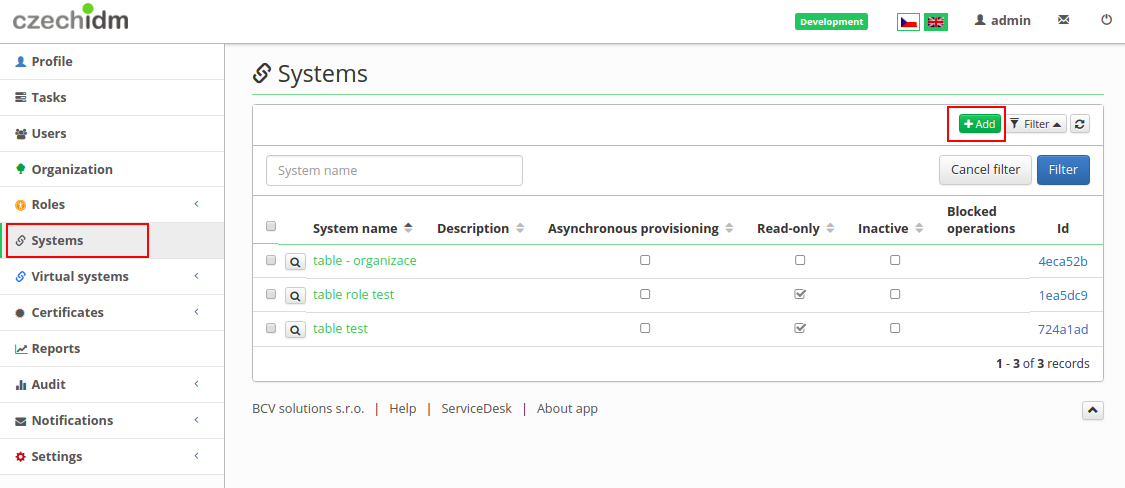
- Go to Systems in the left menu and then click on Add.
- Fill in name of a system. And click on Save and continue.
- In tab Configuration choose LdapConnector
Connector configuration
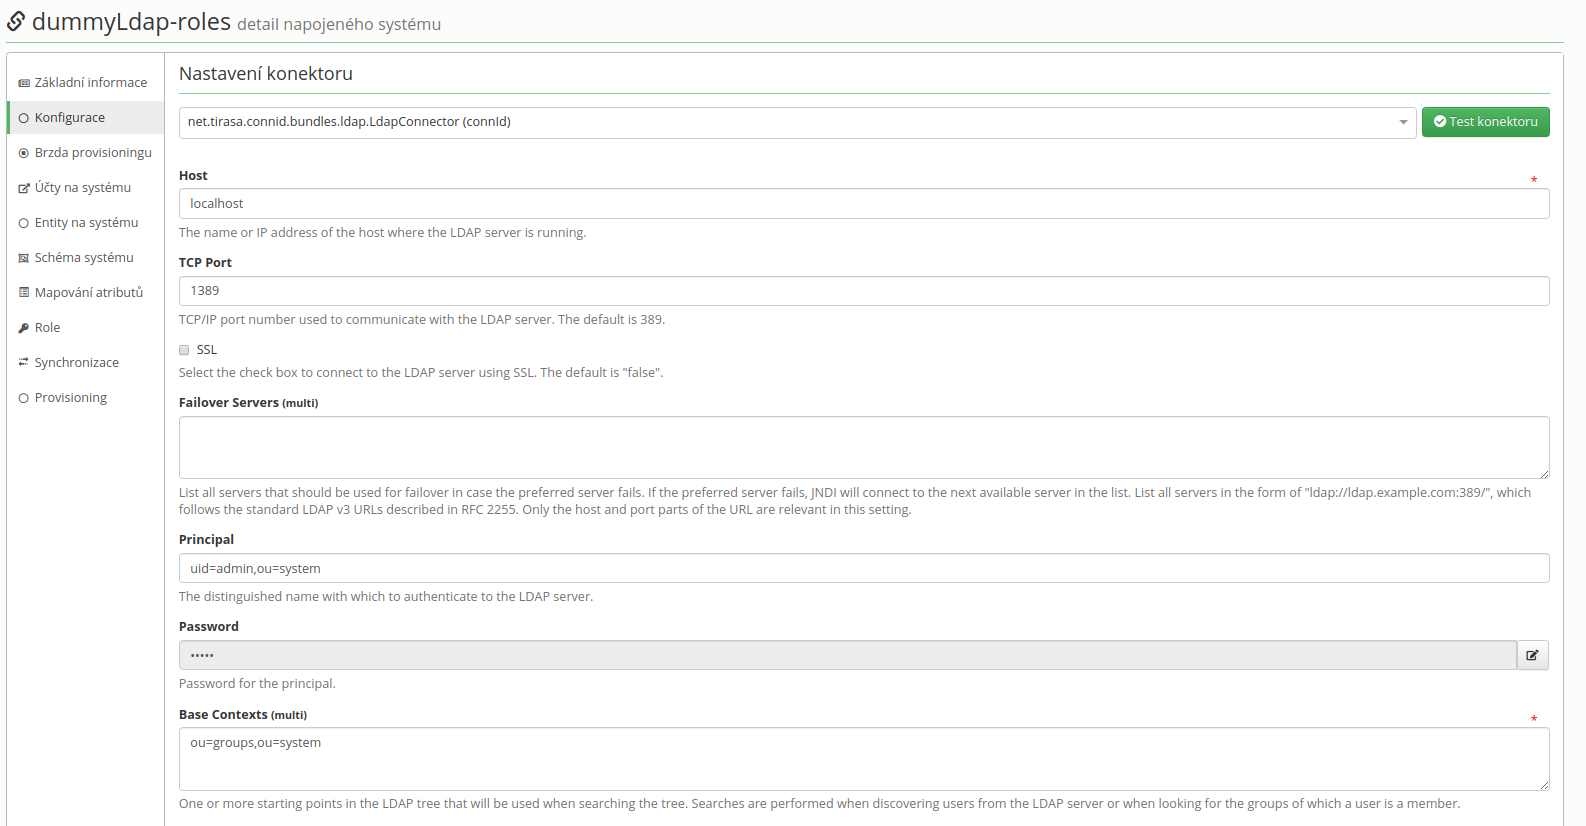
On this page fill in these important values:
- Host - IP address of ad server or hostname
- TCP Port - on this port will server listen
- Principal - with this username connector will connect to the Ldap system, this user has to have enough rights to write.
- Password - password of the "user" account
- Base Contexts - DN or "path", where groups will be created
- Use VLV Controls -Set it true
- VLV Sort Attribute, Uid Attribute - attribut will be identifier, it should be for both the same
Connector's mapping
- Firstly in Scheme tab generate a schema with a green button. If there is some exception, you have probably mistake in the configuration of the connector.
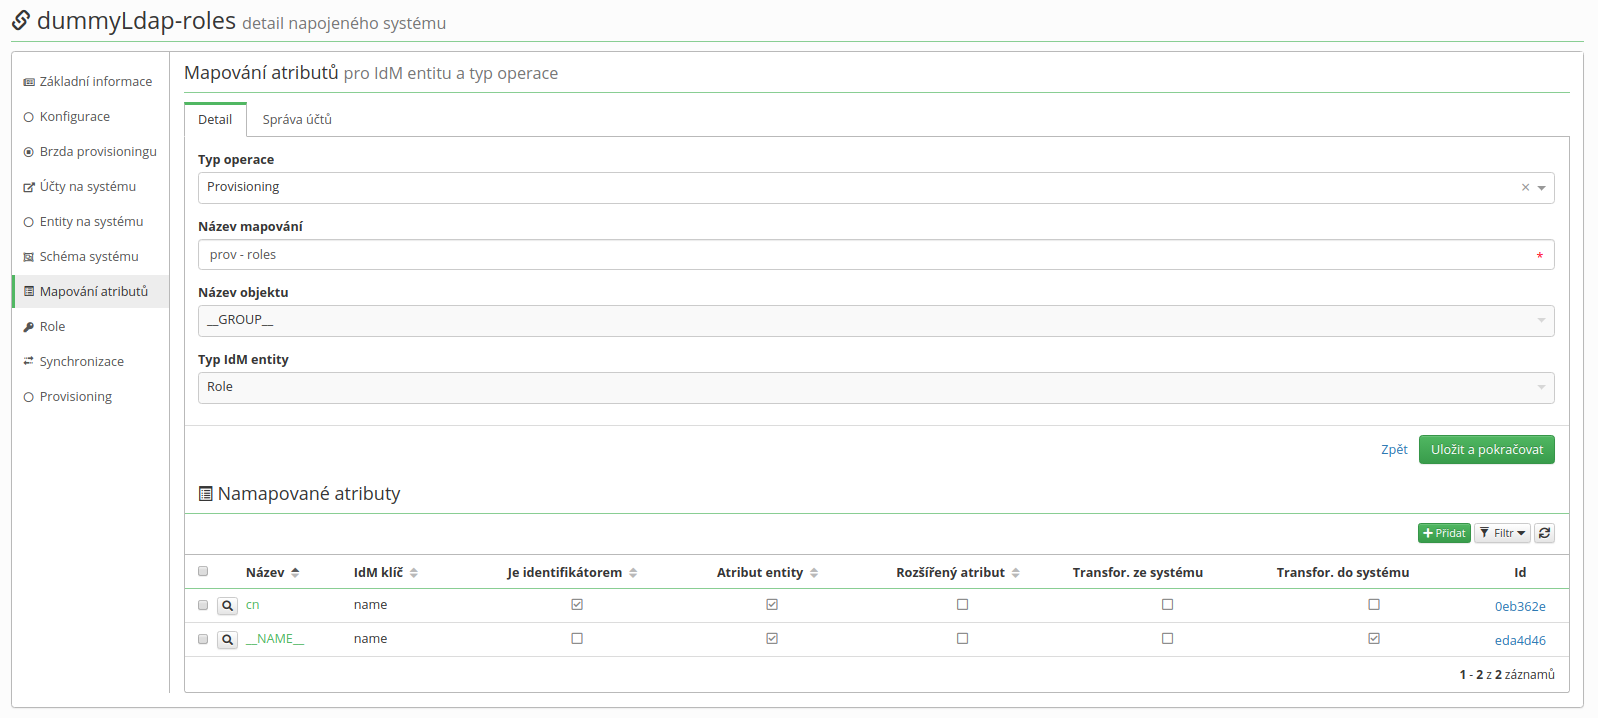
- Then in Mapping tab create new mapping - provisioning (\_\_GROUP\_\_ (Object name), Role (Entity type)).
- Now we will map just 2 attribute. Click on green add button like on picture below and this fill in:
| Attribute in schema  | Name    | Attribute          | IdM key            | Transformation to system                    |
| cn (__GROUP__)       | name    | identifier, entity | name               |                                             |
| __NAME__ (__GROUP__) | name    | entity             | name               | "cn="+attributeValue+",ou=groups,ou=system" |
Make a script
At this point, provisioning of roles is active and if we create a role or re-save already existing, role will be provisioned to database. But we probably do not want propagate all of roles.
Select our system and then agenda Mapping. Select just created provisioninig mapping. On this page there is another tab Account Management. Here you can write a script or add one with green button Insert script. For example you can specify which roles will be propagated based on role name (roles\_a:roleToBeProvisioned) or if role is in specified role catalogue (roles\_a catalogue).
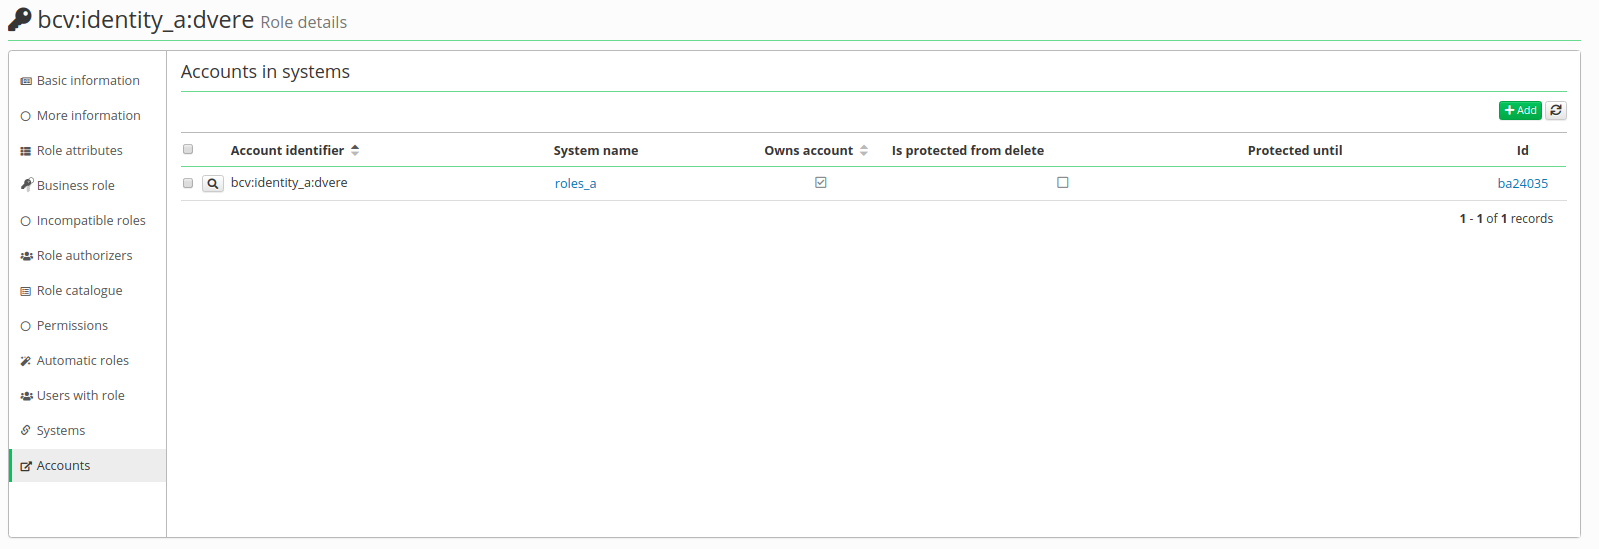
Beware: If you add this script after provisioning of a role. This script will not prevent future provisioning of this role. You have to remove role's account on this system. In agenda Roles on left menu you can find the role, click on magnifying glass. In tab Accounts you can see all accounts of this role (there could be more items, if role was synchronized from system or provisioned to more systems). Here if you remove account, role will be erased on end system. Future provisioning of the role to this system based on script mentioned above.


