Report - Compare values in IdM to system (CzechIdM 12 or higher)
Before we switch a system to a read-write state and become the authoritative source of data for a system, we need to validate that no unexpected changes in the system will occur. To achieve this, use a report which simulates provisioning to a system and compares the resulting values with the current values on the system.
Preparation
- Have a connected system with some provisioned identities.
Configuration
- First of all, go to Reports in the side menu
- Now let's create a new report, click on the green button New report
- Select report 'Compare values in IdM with values in system'
Now we need to configure the report.
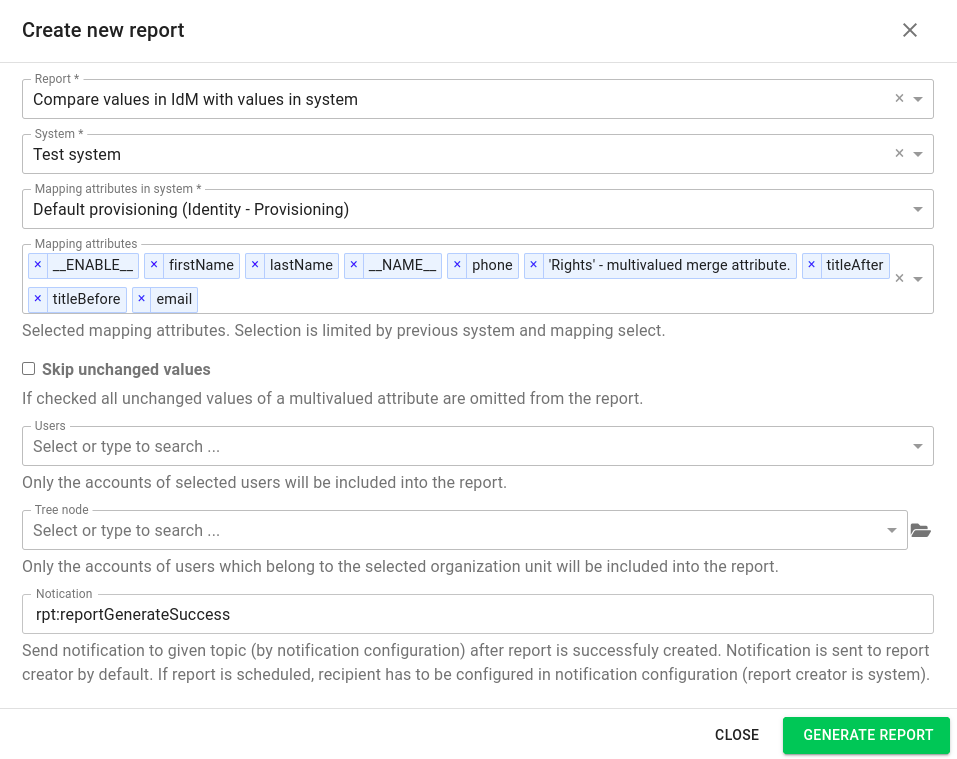
- Select the system you want to validate from the menu.
- Select the mapping you want to use. Always select a mapping of the provisioning type.
- Select the attributes you are interested in. If you leave the field empty, all attributes will be shown.
- If you want, you can check the Skip unchanged values. This is used for multivalued attributes (think MS AD groups) and will only show the values which were changed. This is useful when the users have a lot of values to make finding the differences a lot easier.
- If you want, you can limit the users for which this report will check for possible differences.
- If you want, you can limit the tree nodes (organizational units) for which the report will check for possible differences.
Once you are done with the configuration, click the Generate report button. The report will start to compare the values. This can take some time depending on how many users you have, how many attributes are validated, and how fast the system's response is.

Once the report is generated, you can download it in the XLSX format. Do not download the report in JSON format because it only represents raw data.
Interpreting the result
After you download the report, you need to interpret the data.
The downloaded report will look something like this:

Regardless of your configuration, the first two columns will always be the same:
- The first column is Status and it tells you whether or not any changes were detected. Possible states are:
- ADDED (green background) - the user account on the system does not exist and will be created
- CHANGED (orange background) - the user account will be changed in some ways
- NO_CHANGE (blue background) - the user account will not be changed by the IdM in any way
- FAILED (red background) - something went wrong, possibly some issue in the mapping of the system (a script). Consult the log to learn more.
- NO_ACCOUNT_FOR_ENTITY (yellow background) - the account for the entity does not exist
- NO_ENTITY_FOR_ACCOUNT (light yellow background) - the account exists but there is no corresponding identity in the IdM
- The second column is Idm entity (uid) which is the identifier of the identity.
- The third column (from CzechIdM 13.0.9) is Protected and tells whether account is protected (true/false, n/a for status NO_ACCOUNT_FOR_ENTITY).
Following that are individual attributes. The key to their interpretation is simple:
- blue text - no change was made
- standard (single-valued) attributes - if any change is made, you will see the value on the system in red prefixed with "Sys:", the value in IdM will be in green and will be prefixed with "IdM:"
- multivalued attributes - blue text means that no change in the value was made, green text means the value was added, red text means that the value was removed