Systems - Simple: rest api connector
Basic configuration
In this tutorial I will show you how to connect to Dscs rest api. REST api is created by this tutorial: here
Quick explanation of rest api headers to understand filleds in configuration
Every request (CRUD) contains these attributes:
- Accept: application/json
- login: someUserName
- password: somePasswd
- client: someClientNumber
- businessunit: someBusinessUnit
If request have return body it has one more value:
- content-type: application/json
Quick explanation of rest api returned values from request to understand filleds in configuration
Body of sending request (POST):
{
    "Id": "john.doe",
    "Name": "john",
    "Surname": "doe",
    "Disabled": false,
    "Email": "john@doe.com",
    "Role": "someRole",
    "BusinessUnit": "someBusinessUnit"
}
Body of update request (PUT):
{
    "Id": "john.doe",
    "Name": "newJohn",
    "Surname": "newDoe",
    "Disabled": false,
    "Email": "newJohn@newDoe.com"
}
Get values from api (GET) Api will return body in this format. Attribute names "Id" and "Name" are filled in Configuration !This example is returned body from rest api!:
{
    "Id": "john.doe",
    "Name": "newJohn",
    "Surname": "newDoe",
    "Disabled": false,
    "Email": "newJohn@newDoe.com"
}
Delete entity (DELETE):
Is not supported!
Connector configuration
Go to Systems click Add button set name and block delete operation because delete is not supported. Then click on the Save and continue button.
After save go to the Connector configuration set Connector type as DscsConnectorConnector and click it.
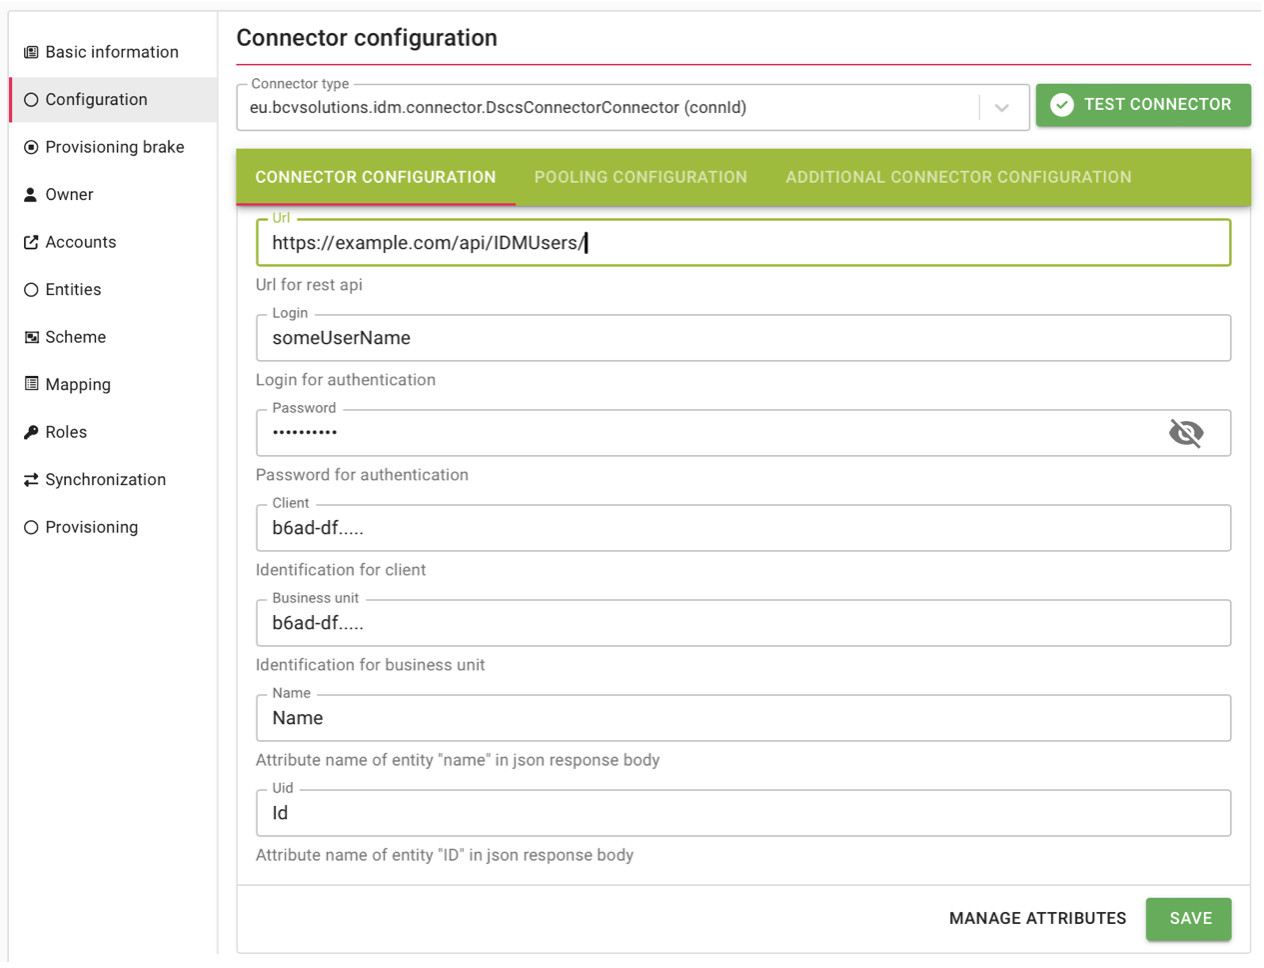
Next, fill form for connection to api. Description of values:
- Url - url where api is accessible
- Login - user name of account for access will be in header of request
- Password - password for account for access will be in header of request
- Client - Identification for client which will be in header
- Business unit - Identification for business unit which will be in header
- Name - this field set what attribute in json will be name for entity. In this case it is "Name".
- Id - this field set what attribute in json will be id for entity. In this case it is "Id".
Example of configuration:
Scheme for attributes
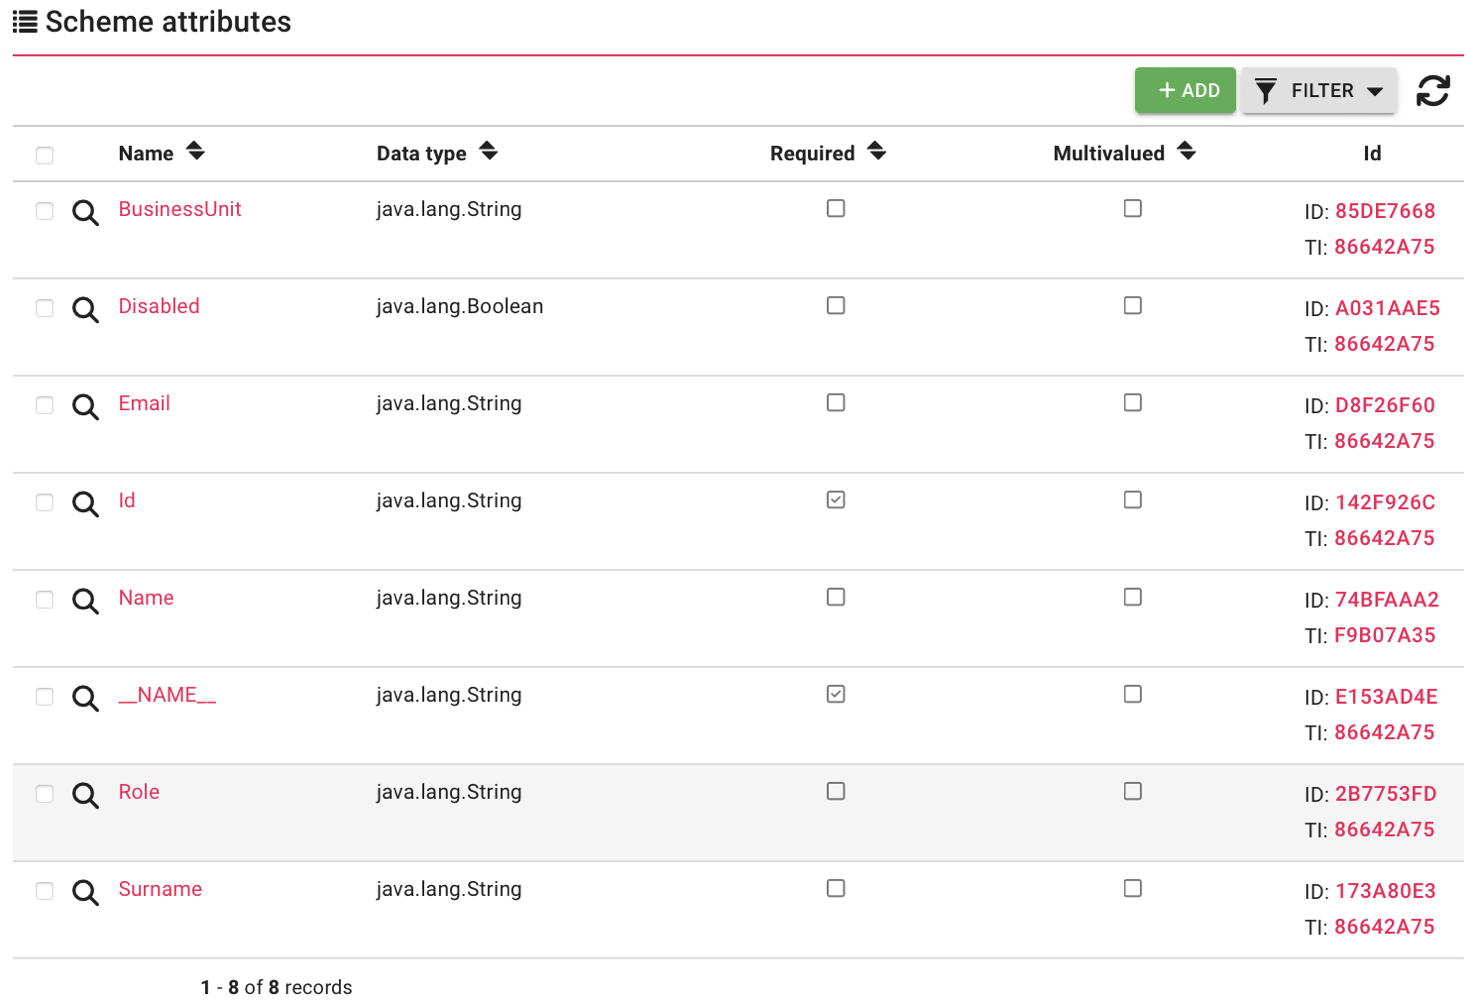
Generate scheme for mapping attributes with green button Generate the scheme for Synchronization and Provisioning. Type of object scheme is ACCOUNT which is for connection of identities. In loaded attributes i have NAME which is defined by standard but not be used in this case.
Example of ACCOUNT object attributes:
Map attributes for synchronization
In Mapping you can map loaded attributes from previous step. Firs of all click add button set Operation type as Synchronization. In Mapped attributes click ADD and fill map attributes. Do not use NAME!
For mapping "Id" is example:
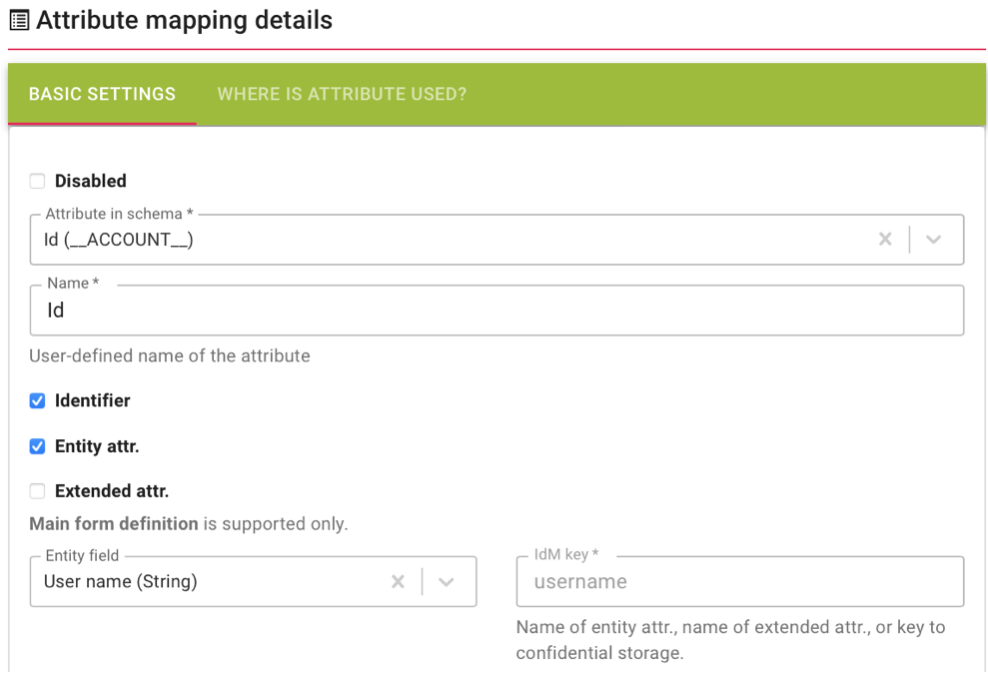
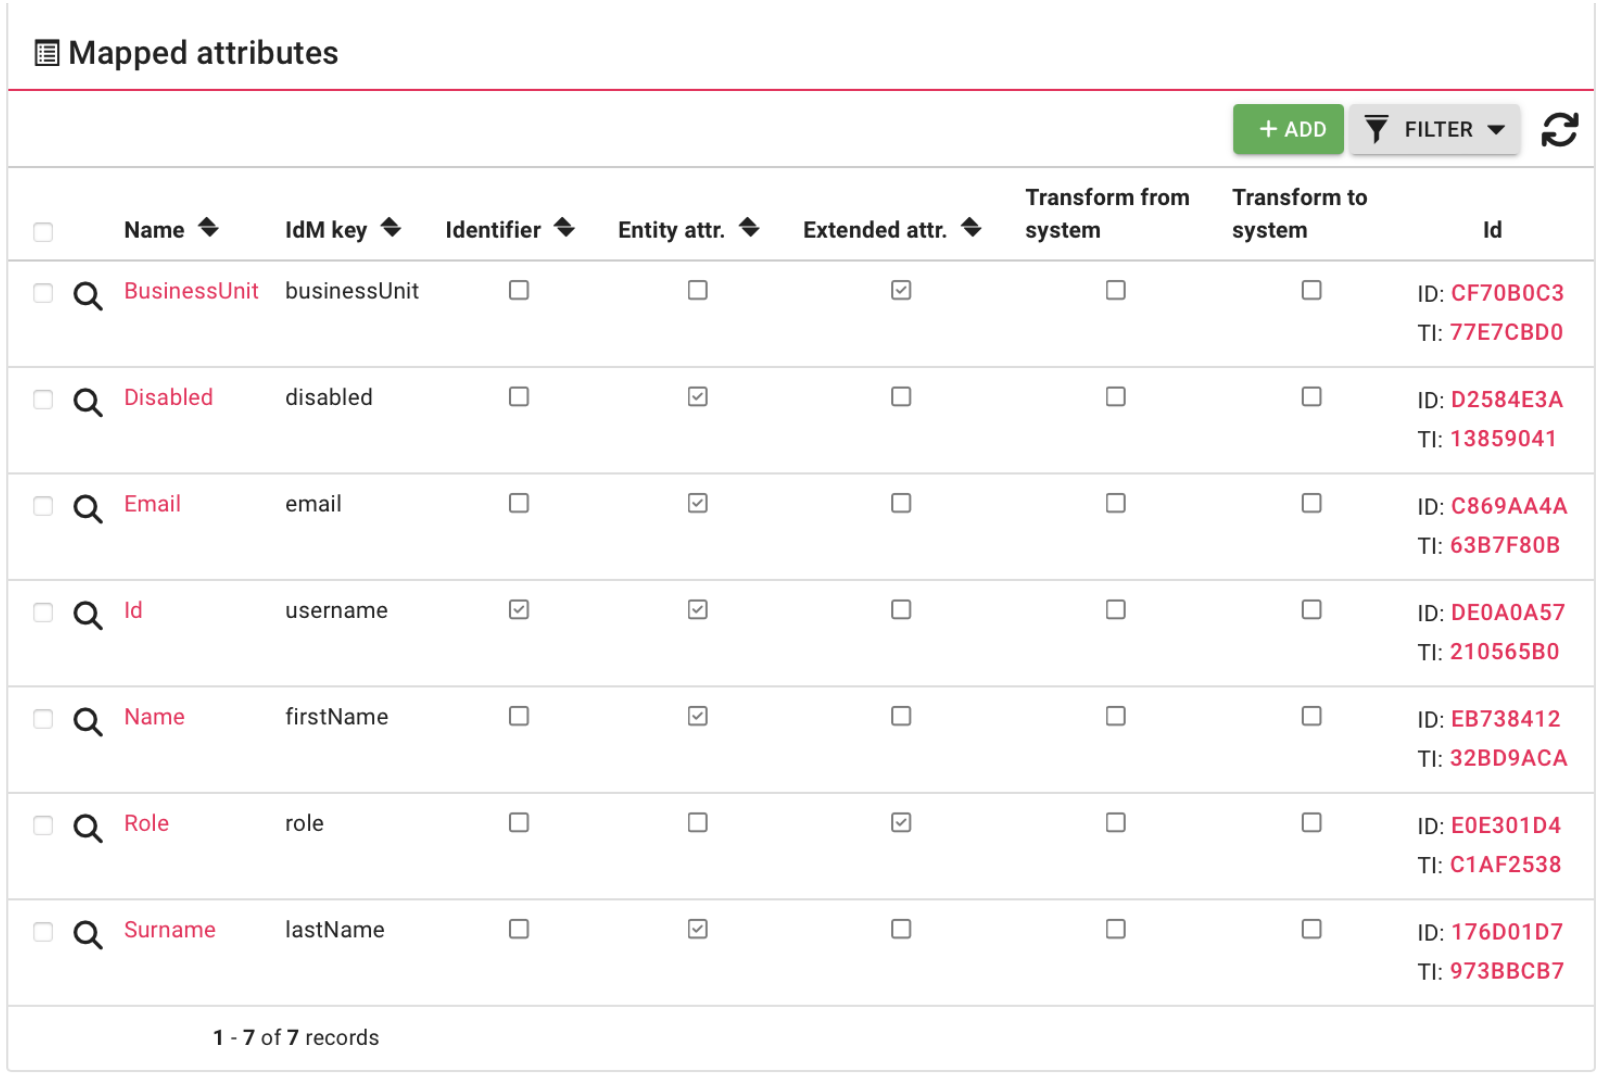
It will connect attributes from json to idm attributes of identity. My mapped attributes for synchronization are these:
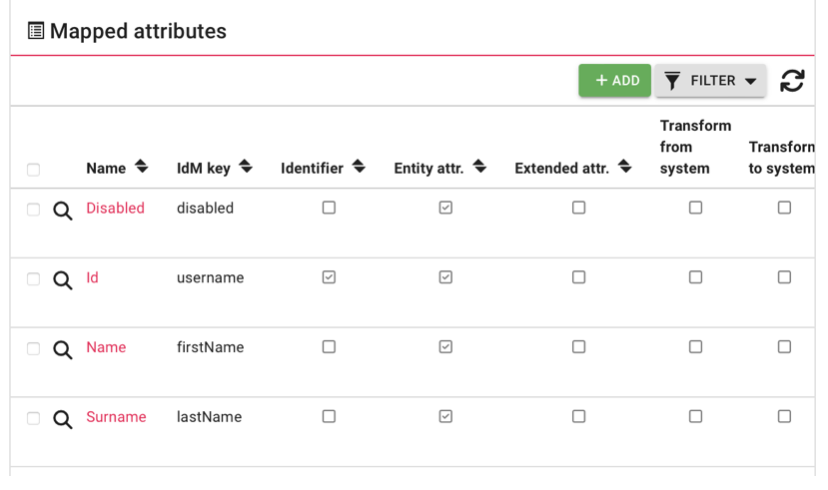
Now on Synchronization tab you can ADD new task. Check Reconciliation checkbox. Fill Name. Choose Set of mapped attributes chose created mapping for synchronization. Finally set Correlation attribute typically Id. Click SAVE AND CONTINUE. Back to Synchronization tab and click start (green arrow).
Provisioning
Create mapping for Provisioning in Mapping tab of system. Mapped attributes will be in json body in requests. set Operation type on Provisioning. And connect attributes. Do not use NAME!
My example:
