CentOS 8 installation for IdM
Reason for this tutorial is that when we were installing 3 times minimal CentOS we ended up with 3 different installations. This guide was created to have one standard OS for IdM which is the best system installation for IdM. System requirements for IdM server are here.
Download ISO file
Fist step is download ISO file with installation from official webside. Installation ISO need to have dvd1 in file name.
The downloaded file will look like this CentOS-8.1.1911-x86_64-dvd1.iso.
As next step you start server with this ISO file.
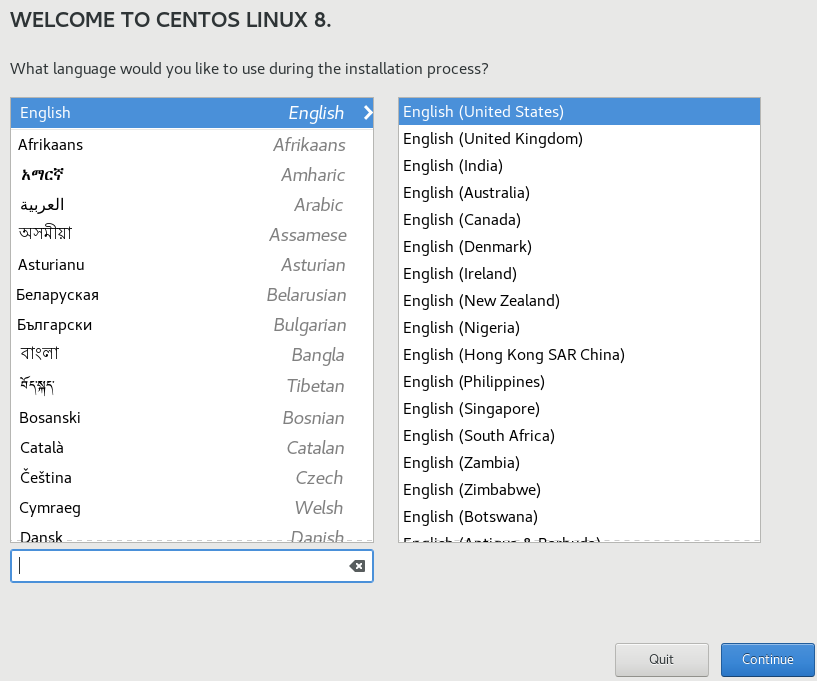
Choosing language
Fist think to set-up in installation is language. Set English - English (United States) and click Continue.
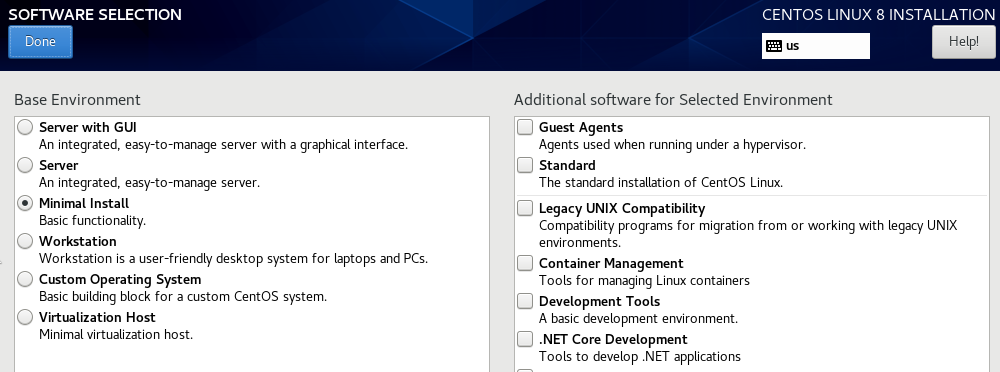
Choosing type of installation
Go to Software selection, choose Minimal install then on right side keep all options unselected and click done.
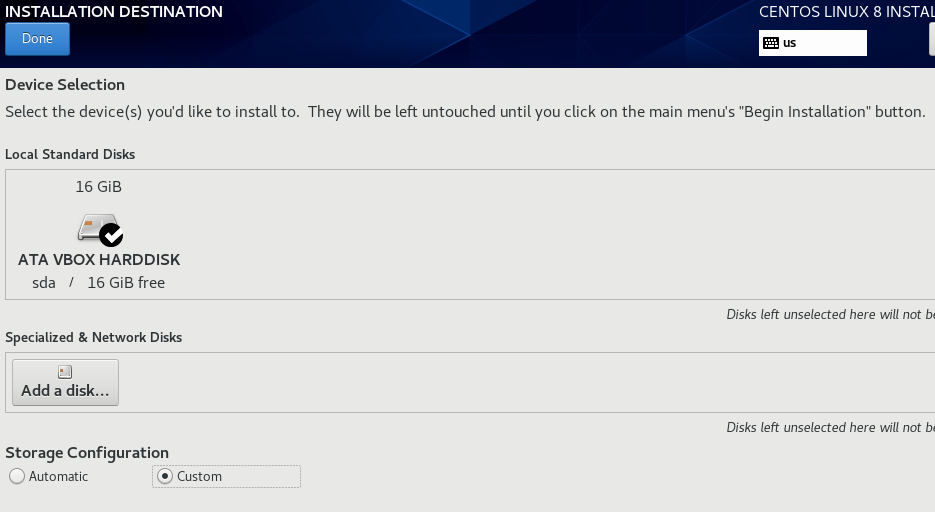
Creating disk layout
Go to Installation Destination and choose disk you want install to. After that in Storage configuration click to Custom. When you are finished click on done.
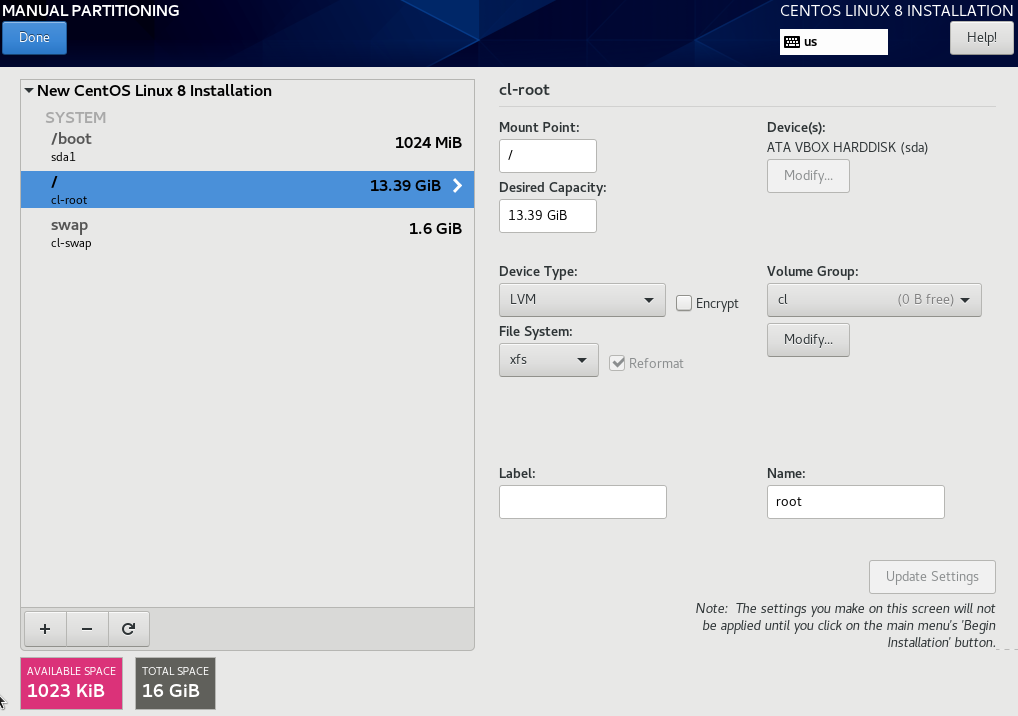
Then set-up partitioning. You can do it manually by clicking on + or automatically by clicking to highlighted text line.
. Also add swap partition and if you need also UEFI partition. Don't forget to create / as logical volume on volume group. hen you are finished click on done and then accept changes.
Network configuration
Go to the Network and Host Name. In lower part is hostname configuration. Set it as you like and then click Apply. Then choose network interface you want to configure and click Configure….
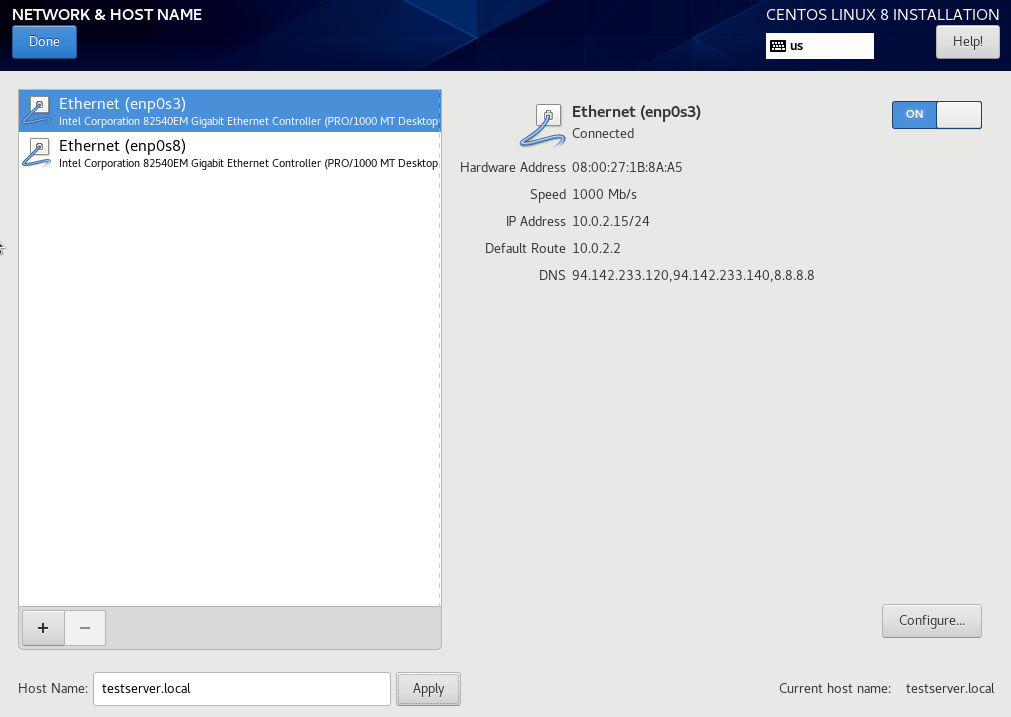
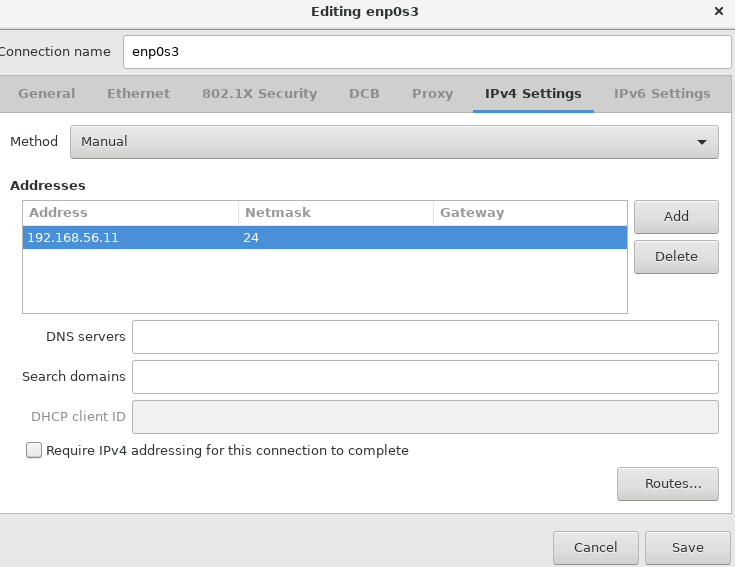
There you are able to make all changes on interface you want (set IP, mask, gateway, DNS server..). It's important to IdM server to have static IPv4 address and mask. After you do all the changes click on save. Don't forget mark ON when you want have interface started. If you do this with all interfaces you want to configure click done.
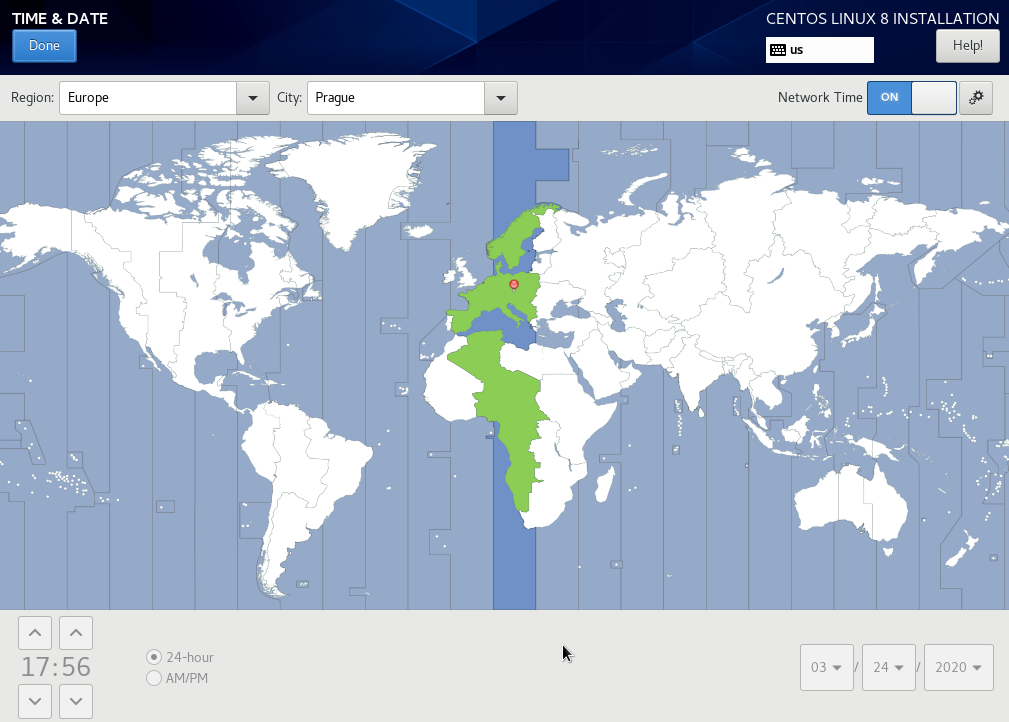
Time and Timezone
Go to the Network and Host Name. Set a correct time zone. Then click on gear button next to the Network time. There set-up to where your server will look for time. Then click ok and done.
Begin installation
When everything is set up click Begin installation. After installation begin you must configure root password.
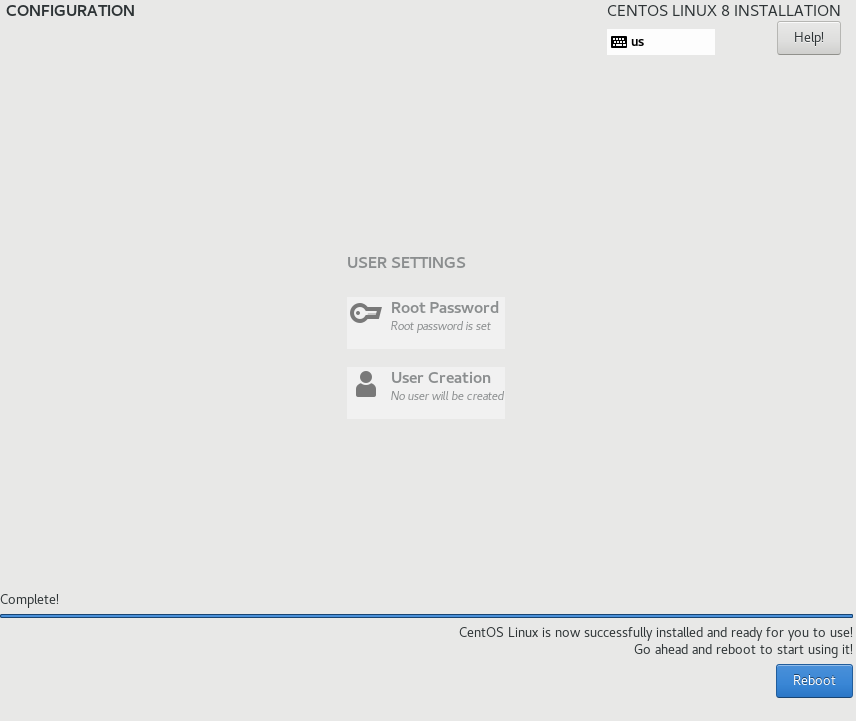
When installation is finished reboot the server and eject the installation ISO. CentOS will boot normally. You should login to the server as root to check if everything is ok. Also sshd is up after system start so you can log in through SSH.